Grilled chicken marinade is an interesting idea for preparing meat before roasting. Grilled chickens as a business with high profitability Do-it-yourself grilled chickens
- Chicken - 1 pc.
- Paprika - 2 tsp
- Ground black pepper - 1 tsp (you can mix peppers)
- Salt - 1.5 tsp
- Sunflower oil - 3 tbsp
- Towel - 1 pc.
- Cellophane bag (packing) - 1 pc.
Grilled chicken cooking time - 2 hours.
My chicken was 1.5 kg, so this recipe is designed for that weight.
How to cook grilled chicken on a spit:
Step 1. Rinse the chicken well with cold water and wrap it in a clean towel so that excess moisture is absorbed and the carcass absorbs more of the marinade.
I didn’t take a picture of step 1, because I think it’s not very interesting and everyone can do it here.
Step2. Mix paprika, pepper, salt, oil in the indicated proportions. Grate a dry bird well with marinade (and inside) and “mash” a little. Next, put in a bag, tie and leave to marinate for 20 minutes. I always leave it overnight so it tastes even better!
Step3. After the time has elapsed, take it out of the package. Let stand for 5 minutes to stack excess marinade (we do not need it) and put on a skewer. 
Step4. Can be placed in a cold oven. To seal the crust, first set the temperature to 200 degrees and let the carcass brown for 20-30 minutes. Then lower the temperature to 150 degrees and leave to fry for 1 hour.

ATTENTION ADVICE!! Dear hostesses, it is advisable to substitute a baking sheet (or a heat-resistant cup) before frying, since juice from (there is not much of it) will drip there.
That's all! Our beauty is ready! For a side dish, you can offer ordinary boiled potatoes or just a vegetable salad, or you can even eat it without anything.

I hope this dish will be a worthy decoration of any holiday table.
And finally, the sauce recipe:
- sour cream - 0.5 l
- dill - 1 bunch
- garlic - 3 cloves
- cucumber - 1 pc.
- salt to taste.
Finely chop the dill, squeeze the garlic with a garlic press, rub the cucumber on a fine grater. Mix everything with sour cream, salt to taste.
The sauce is ready! Enjoy your meal!
A successful marinade for grilled chicken can not only give the meat the right taste and make the bird's flesh more tender. A properly selected spicy mixture will skillfully smooth out imperfections and emphasize the advantages of the original product, as well as make the upcoming meal tasty and unforgettable.
How to marinate grilled chicken?
Having chosen the desired marinade for grilled chicken, the secrets of the taste of your favorite delicacy can be comprehended by studying the technology of using the spicy mixture and the actual heat treatment of the bird itself.
- Before pickling, the whole bird carcass or its parts are rinsed, thoroughly dried from moisture residues.
- Parts of a bird or a whole carcass are flavored with the prepared marinade mixture from all sides.
- Any seasoning for grilled chicken maximizes its taste and aroma when interacting with vegetable oil, which is preferable to use in every recipe.
- Marinate the bird in a non-metallic bowl or bag, placing it on a refrigerator shelf for 4-24 hours.
Marinade for grilled chicken as in the store

According to the recipe below, you can make a classic grilled chicken marinade, often used by specialized departments of supermarkets or other outlets selling goodies. Initially, the carcass is soaked in a pure saline solution, and then rubbed with a mixture of seasonings for several hours.
Ingredients:
- boiled water - 1 l;
- salt - 50-70 g;
- dried garlic - 2 teaspoons;
- ground paprika and black pepper - 1 teaspoon each;
- refined vegetable oil - 2 tbsp. spoons.
Cooking
- Salt is dissolved in warm boiled water, the solution is allowed to cool and the chicken carcass is immersed in it for 8-10 hours.
- The bird is removed from the brine, dried, rubbed inside and out with a mixture of vegetable oil with paprika, pepper and garlic.
- After a couple of hours, you can start roasting the bird on the grill.
Brine for grilled chicken

Laconic salt solution for grilled chicken, as in the previous recipe, can be made more refined and original by adding granulated sugar and a variety of spices to the water along with salt, thanks to which the appetizer will become spicier, more fragrant, juicier and rosier. After pickling, it remains only to grease the dried carcass with oil and bake on the grill.
Ingredients:
- boiled water - 1 l;
- salt - 50-70 g;
- sugar - 30-50 g;
- garlic - 4 teeth;
- thyme, sage - 1 teaspoon each;
- bay leaf - 2 pcs.;
- peppercorns - 5-7 pcs.;
- refined vegetable oil - 3 tbsp. spoons.
Cooking
- To prepare a liquid marinade for grilled chicken, pour water into a container, add salt, sugar and heat, stirring until boiling.
- Lay chopped garlic, boil all seasonings for 5 minutes, cool.
- Lay the prepared chicken carcass in the cooled brine, leave it in the refrigerator for 10 hours or more for soaking.
How to marinate grilled chicken in the oven?

Grilled chicken marinade in the oven can be either the simplest, including a mixture of peppers with vegetable oil and herbs, or multi-component, prepared from meat softening components with the addition of spices, spices and all kinds of flavorings. The following is a balanced version of the spicy mix, which gives an excellent result.
Ingredients:
- salt - 50-70 g;
- garlic - 4 teeth;
- basil and marjoram - a pinch each;
- curry - 2 teaspoons;
- a mixture of peppers - 1 teaspoon;
- lemon juice - 1 tbsp. a spoon;
- vegetable oil - 50 ml.
Cooking
- Salt is poured into a bowl, peeled garlic cloves are squeezed out, oil and lemon juice are poured in, all seasonings and spices are laid.
- Mix the resulting grilled chicken marinade, rub it on the bird and leave to soak for at least 6 hours, and ideally overnight.
Marinade for grilled chicken fillet

Grilled chicken marinade at home, designed according to the recommendations below, is suitable for pre-training for grilled chicken. The selected mix of ingredients will not only give the delicacy a bright and unforgettable taste, but also help preserve the juiciness of the often dry part of the chicken carcass. The number of components is designed for 4 halves of the fillet.
Ingredients:
- garlic - 2 cloves;
- olive oil - 50 ml;
- lemon - ½ pc.;
- brown sugar - 2 teaspoons;
- turmeric - ½ teaspoon;
- chili - 1 pod;
- cilantro or parsley - 1 bunch;
- salt - 1 teaspoon.
Cooking
- Chopped greens, garlic, chili and salt are mixed in a mortar, rubbed with a pestle.
- Lemon juice, butter, sugar, turmeric are added, mixed, rubbed with the resulting mixture of breasts and left in the refrigerator for 4 hours.
- Before heat treatment, remove the fillet from the marinade and wipe the pieces of pepper and garlic with a napkin.
Grilled chicken marinade with soy sauce

To make juicy grilled chicken unusually piquant and bright in taste with tender and soft meat, you can use a mixture based on soy sauce to marinate it, which is supplemented with adjika or mustard and flavored with the desired spicy additives and spices that match your preferences.
Ingredients:
- soy sauce - 1 cup;
- adjika - 1 tbsp. a spoon;
- olive oil - 20 ml;
- curry - 2 teaspoons;
- a mixture of peppers, seasonings.
Cooking
- Rub chicken with curry, pepper and seasonings mixed with oil and adjika, pour soy sauce and leave to marinate for 6-12 hours.
- In order for the chicken in soy sauce on the grill to be appetizingly ruddy, you can grease its surface with mayonnaise before baking.
Sweet and sour marinade for grilled chicken

Grilled chicken at home will turn out especially tasty if you marinate it first in a sweet and sour mixture of honey or sugar and lemon juice, which can be replaced with wine or balsamic vinegar. The contrast of flavor combinations of the components of the marinade has the best effect on the final result.
Ingredients:
- lemon juice - 60 ml;
- soy sauce - 60 ml;
- honey or sugar - 50 g;
- sesame oil - 2 tbsp. spoons;
- pepper, spices.
Cooking
- To prepare a marinade for a whole grilled chicken, liquid honey is mixed with soy sauce, oil and lemon juice, while adding pepper and spices.
- Rub the chicken carcass with the resulting mixture and leave it in the bag for 8-12 hours in the refrigerator.
Grilled chicken with garlic

A simple marinade for grilled chicken, presented below, despite the banality, will end up with an excellent taste of the finished delicacy. The use of garlic is always a win-win - the teeth give the chicken the missing piquancy and make its meat fragrant and appetizing, while the oil will keep it juicy.
Ingredients:
- garlic cloves - 7 pcs.;
- butter- 70 g;
Cooking
- Grind the peeled garlic, mix with soft butter.
- The chicken carcass is rubbed with salt, pepper, and on top with an oil-garlic mixture.
- Leave the bird in the bag in the refrigerator for 6-12 hours.
- Before grilling, grease the carcass with additional vegetable oil.
Grilled chicken in Polish on a fire whole

The original Polish chicken is cooked in the oven on a bed of sauerkraut, with smoked sausages and tomatoes. To decorate a dish on a fire, a marinated whole chicken carcass can be stuffed with a mixture of the necessary ingredients, sewn tightly with a thread, and only then cooked over coals.
Ingredients:
- chicken - 1 pc.;
- cabbage - 250 g;
- smoked sausages - 2 pcs.;
- tomato - 1 pc.;
- paprika - 1 tbsp. a spoon;
- lemon juice - 2 tbsp. spoons;
- salt, pepper, vegetable oil.
Cooking
- Initially, they prepare a quick marinade for grilled chicken from salt, pepper, lemon juice, paprika and oil, rub the carcass with it, leave for a couple of hours.
- Cabbage is mixed with chopped tomato and sausages, chicken is stuffed with mass, sewn up.
- Cooking a bird on a fire over coals.
Grilled chicken with lemon

Grilled chicken marinade with lemon will give the meat a pleasant sourness, make the flesh soft and fragrant. Before removing the lemon peel, the citrus fruit is immersed in boiling water for a couple of minutes. This technique will save the additive from bitterness, which can adversely affect the final taste characteristics of the chicken.
Ingredients:
- lemon - 1.5 pcs.;
- olive oil - ¼ cup;
- ground black pepper - 1 tbsp. a spoon;
- Italian herbs - 1 tbsp. a spoon;
- salt.
Cooking
- To make a lemon marinade for grilled chicken, remove the zest from the fruit, squeeze the juice and mix the resulting ingredients with oil, Italian herbs, salt and black pepper.
- Flavor the resulting mixture with chicken and marinate in a bag for 6-12 hours.
Even in ancient times, people ate meat, but nowadays we don’t eat it raw, now we know a lot of ways to process it: frying, boiling, and others. At the same time, home-cooked is especially popular, it is distinguished not only by good taste, but also useful properties(chicken is in first place among all products in terms of the content of nutrients).
At home: preparing dishes
At home, such a bird can be cooked or in the oven. In the latter case, you will need a brazier. Those housewives who have a grill prefer to cook chicken on a spit.
We prepare products
First of all, you need to choose the right bird, the taste of the dish itself will depend on this. It is best when the chicken is homemade, since only natural ingredients are included in its diet. It is enough to rub such meat with salt and pepper, and also grease with oil. The meat of young chickens is well suited for grilling, then the dish will turn out tender and tasty, while the old bird turns out to be tough. Store-bought chickens choose non-frozen ones so that they are not hard and dry.
Grilled chicken at home: cooking on a spit

This dish is cooked outdoors on coals. At the same time, one kilogram of coal is taken for one kilogram of birds. Ingredients: one chicken, one glass of mayonnaise, one tablespoon of mustard, salt and spices, garlic, one lemon.
Cooking process
The chicken is washed and dried. Meanwhile prepare the sauce. To do this, mix mayonnaise with mustard, add crushed garlic. ready mix rub the bird, squeeze the juice from the lemon inside. The chicken is put on a skewer, legs and wings are tied strong thread. Thus, the spit replaces the grill. You can buy it in almost any supermarket. It is fried on a spit for one hour, gradually bringing it closer to the coals. For the last half hour, the meat is rotated continuously. Cooked will have a juicy crust, and its taste will be exquisite.
Grilled chicken at home: cooking in the oven

Ingredients: one chicken, a few cloves of garlic, two tablespoons of mustard, a mixture of salt, three tablespoons of sour cream, bay leaf and allspice.
Cooking process
The chicken is rubbed with garlic, smeared with mustard and sprinkled with a mixture of seasonings. Two-thirds of water is poured into a jar with a narrow neck, allspice and bay leaf are placed. After some time, when the bird marinates, it is placed in the oven, placed on top of the jar. Thus, the chicken during the baking process will be saturated with the aromas of laurel and pepper. Ten minutes before readiness, it is coated with sour cream.
What do you eat grilled chicken with?
Simple vegetable salads can be served with the finished dish (recipes with photos can be found on culinary sites). Rice, pasta or potatoes are used as a side dish. The sauce is chosen sweet and sour or garlic, according to etiquette, they are poured over the bird before cutting it. But if the chicken is already cut, then they eat it with their hands, dipping the pieces into the sauce.
This method is not in vain considered the simplest - no preliminary preparation is required for it. All that is needed is to string the chicken on a metal skewer and put it in the oven, placing a baking sheet under the bird's carcass so that the juice that stands out does not stain the oven. It is necessary to cook grilled kuru in the oven for an hour - an hour and a half at a temperature of approximately 240 degrees. It is better to check the readiness of the meat with a knife.
Cooking grilled chicken on the grill
To cook grilled chicken in the oven on a wire rack, the bird must first be cut. Marinated chicken pieces should be laid out on a wire rack, placing it in the oven approximately in the middle, and a baking sheet should be placed under the wire rack to drain fat. You need to cook the chicken for twenty-five to thirty minutes, in the process, the pieces of meat must be turned over several times so that the crust is well fried.
We sincerely hope that our step by step recipe with a photo helped you answer the question of how to cook grilled chicken in the oven.
Author:
Holidays in the country are always associated with a pleasant pastime, a noisy company of friends and cooking in the countryside. fresh air. Food in nature seems tastier, and its smell, mixed with smoke, causes a strong appetite. This atmosphere can be created by grilling meat and vegetables. A similar brazier can be purchased at the store, but this pleasure will require a significant investment. In order not to spend extra money, you can build a grill for a summer residence with your own hands.
General design device
A grill is a special portable or stationary installation for preparing various culinary dishes on an open fire. The classical form of this design is a deep metal container in which grates are installed at different levels: the lower one is for arranging coals, the second one is for cooking.
The grill is equipped with a lid, but some models are made without it. The first option is more functional, as it allows you to cook in three ways:
- direct;
- indirect;
- combined.
There are three types of grill:
- Classical.
- Connected to the mains. Grills of this type are used as additional equipment for professional and home kitchens.
- Operating on gas.
Options that run on gas and electricity are more functional, but for a summer vacation, many prefer a charcoal grill.
Photo: different types of grills
Table: advantages and disadvantages of a classic grill
Not only coal can be used as a furnace material. Currently, he has an alternative - special briquettes. Using this solid fuel provides fast ignition, maintaining a constant temperature for a long time. Briquettes are pressed bars from different types of wood.
What is the difference between a grill and a barbecue
Quite often, people do not find differences between a grill, barbecue and barbecue. Each of the braziers has individual characteristics, despite the fact that they are used for cooking on coals.
most simple design has a barbecue. This device is a metal box. Food is cooked on metal skewers. Hot coals are located at the bottom of the box.
In order for the heat to be uniform, several small holes are drilled in the sides of the brazier.
The difference between a grill and a barbecue is only that the first one does not have a lid, while the second one is equipped with a skewer and lockable hatches for air supply.
Preparation: drafting drawings, material selection
For the manufacture of a country street grill, improvised materials are suitable. You can use a metal barrel, empty gas bottle or bricks.
The creation of each design requires careful preparation, calculations, drawing up drawings and diagrams
Barrel
When choosing this material, you should make sure that the case is not covered with rust, has no dents or other deformations.
For grilling, it is best to use a 200 liter container. The wall thickness of such a barrel should be from 0.8–1.0 cm. This is enough so that the metal does not burn out with regular use. The body height is usually 85 cm, which makes the design convenient to operate.
Barrels with a wall thickness of less than 0.5 cm are not recommended.
For such a grill you will need the following materials:
- Barrel with a capacity of 50 to 200 liters.
- For the manufacture of legs - 4 steel tubes, 110 cm long, 3–4 cm in diameter.
- To strengthen the structure, two similar tubes of 60 cm and two of 40 cm each.
- 2 metal door hinges.
- For handles on the body and lid - 3 "P"-shaped parts made of thick reinforcement.
gas cylinder
When making a grill, old cylinders are often used. Propane containers are best. The thickness of the walls in them is 3 mm, and the diameter is 29 cm. So, the body will not burn out, and the brazier will be large enough.
To make a grill from a gas cylinder, you can use materials similar to the barrel option.
Brick
Not every type of brick is suitable for building a grill. For this, facing (for the body) and fireclay (for the furnace part) are used.
To build such a grill you will need:
- 150 red bricks;
- 35 fireclay bricks;
- finished grating or 30 steel bars 5 mm thick;
- reinforcing bars for reinforcing the foundation;
- concrete mix brand M 300;
- sand;
- gravel.
This design requires a solid foundation in the form of a slab foundation.
The finished plate must be at least 10 cm wider than the grill structure on each side. Its size will be 160x160x20 cm.
To find out the volume of the concrete mixture, it is necessary to multiply the height, width and length of the future foundation. For convenience, these parameters are recommended to be used in meters: 1.6 1.6 0.2 = 0.512 m³.
In order for the concrete base to be strong, it must be reinforced. To do this, use a mesh of metal rods, which is made of reinforcement with a thickness of 0.5 to 0.8 mm. The mesh size is 10x10 cm.
The calculation of reinforcement is more convenient to do in running meters. To find out how many rods are needed for the grid, you need to divide the length and width of the base by the size of the cell: 160:10 = 16 pieces - this is the number of rods placed across the width of the plate. Since it is square in shape, the same number of rods will be needed along the length of the plate: 16 + 16 = 32 pieces.
In order to further strengthen the foundation, two such grids will be required: 32 + 32 = 54 bars. Now you need to find out how many linear meters you need to purchase: 54 1.6 \u003d 86.4 m.
Lattice
You can buy a grill rack at any hardware or sporting goods store, but it's cheaper to make your own. This will require stainless steel wire, 3-5 mm thick.
You can also use:
- steel corners with a side width of 2 to 5 cm (for effective heat they are set at an angle down);
- from sheet steel cut into strips 3–5 mm wide.
The optimal grid size is 40x60 cm.
The rods will be located perpendicular to the wide part of the lattice. To find out how many rods are needed, you need to divide the length of the lattice by the width of the rod and the cell (usually this parameter is 5 mm). Now you can calculate: 60:1=60 pieces. The width of the lattice will be 40 cm, therefore: 60 40 \u003d 2400 cm, or 24 linear meters.
Required Tools
To make a metal grill, you will need the following tools:
- manual circular saw;
- file;
- a hammer;
- welding machine;
- electrodes;
- yardstick.
If desired, a metal grill can be equipped with a motor that will be responsible for maintaining the desired traction.
If a brick structure will be made, you will need:
- shovel;
- concrete mixer or container for mortar;
- trowel;
- building level;
- brush;
- cord;
- pencil or marker;
- polyethylene.
Step-by-step guide to building a grill house with your own hands
The grill house is a small building resembling a gazebo. The classic version of the design has an octagonal shape with closed walls, equipped with windows and a door. Inside the grill house, usually in the center of the room, a brazier with a chimney is installed. Around it, benches are installed parallel to the walls. Thanks to this placement, everyone inside the room will be able to observe the cooking.
An octagonal or round table is often placed around the grill.
The area of the premises is made taking into account the placement of up to 12–15 people in it. The roof of the structure is made in the form of an octagonal cone, on top of which there is room for installing a chimney.
The grill house is most often erected in the form of a frame structure, followed by insulation. This allows you to save on building material.
Choosing the type of foundation
During the construction of a grill house, a foundation is required, which can be:
- columnar;
- on screw piles;
- tape;
- slab.
Each of these types of foundation is used depending on the quality of the soil. The choice is an important preparatory stage for the construction of a grill house, since the integrity of the entire structure depends on it.
If there is a predominant amount of sand in the soil, then when the snow melts or during the rainy season, it can shift. In this case, it is recommended to build a slab, strip or pile foundation.
Soil with a high content of clay and sandy loam is prone to deep freezing, which makes it unstable. For such soil, it is better to use screw piles.
In swampy areas, only a pile foundation is also used.
Soil with a high content of gravel is not subject to deep freezing and deformation under the influence of moisture. Such soil, perhaps, is most suitable for construction, including for a grill house.
If the site is located on rocky ground, then there is no need to install a deep foundation. In such an area, all types of foundations can be used, except for screw piles.
Instructions for erecting a structure for recreation
To build a grill house, you will need to follow these steps:
- Select an area. Free it from debris and foreign objects.
- Make markings for the pit. Since a slab foundation was chosen for the grill house, the hole must be made 40 cm deep. For marking, it is convenient to use a cord stretched over the stakes, which forms a perfectly even line.
- After digging a pit, you need to level its bottom.
- Pour in sand to form an even layer, 10 cm thick. It is better compressed if it is wetted.
- Top with a layer of gravel of the same thickness.
- Now you need to install the formwork so that the foundation does not spread when pouring. To do this, you can use thick plywood, boards or OSB boards. From these materials it is necessary to make strips equal to the length (400 cm) and height (25–30 cm) of the pit.
- Install these wooden shields inside the pit, pressing each of them against the walls.
- To strengthen a concrete slab, it must be reinforced. To do this, from rods, 0.8–1.0 cm thick, make two identical gratings. The size of the cells should be 15x15 cm. Strengthen the intersections of metal rods with wire or plastic clamps. The frames should be laid in such a way that they do not touch, while the first does not touch the gravel. To organize such a space between the gratings, you can use the halves of the bricks.
- In order for the fire not to go out in the finished design of the grill house, air supply to the brazier is necessary. To do this, you need to install a "P" -shaped pipe with a diameter of 15 cm, a length of 155, according to the diagram. One end of the pipe protrudes from the middle of the foundation, the other is brought out beyond its limits.
- Lay both grids with respect to the gaps between them.
- Now you need to pour the mixture into the formwork. To do this, use concrete grade M 250 or M 300. In order for the mixture to be evenly distributed throughout the entire space of the pit, it is leveled with a shovel. The top grate should be completely hidden under the concrete layer.
- The liquid foundation needs time to solidify. In the summer, 3 to 5 days are enough for this, and in the cold months this period can last up to two weeks. It should be noted that under direct exposure to the sun, the mixture will dry unevenly. This is fraught with the fact that the foundation will be covered with cracks. Therefore, in the first two days after pouring, every 10–12 hours, the base must be moistened with water. In addition, the foundation must be covered with thick polyethylene. This will help prevent rapid evaporation of moisture, and protect the base from sunlight.
- Once the concrete has hardened, move on to installing the bottom timber framing. First of all, it is necessary to cover the surface of the foundation with a waterproofing layer. To do this, you can use liquid bitumen or roofing material.
- Before use, all wooden structural elements must be treated with antiseptic impregnations and antifungal agents. For the lower strapping, it is recommended to use bars with a section of 150x150 mm. At the ends of each of them, cuts must be made to create a “half-tree” connection.
- Install the bars on the foundation. To do this, use anchor bolts or metal corners.
- Inside the octagonal frame, install logs for the floor. To do this, you can use bars with a section of 150x100 mm. They are recommended to be placed parallel to each other or from the inner corners of the structure to the center, closing them around the pipe.
- Now you need to install 8 support posts. To do this, you need to use bars with a section of 150x150 mm and a length of 250 cm. They must be installed vertically on the bottom harness. To do this, in the upper part of the corners of the lower trim, it is necessary to drill a hole with a diameter of 20 mm. For the frame of the grill house, pins (a cylindrical wooden pin) 8 to 10 cm long and 20 mm in diameter will be required. To keep the racks in a vertical position, they are reinforced with slopes.
- Between the vertical supports install window sill boards. To do this, you need bars with a section of 50x150 mm.
- From similar parts, install vertical racks for the window frame.
- Now you need to make the frame of the upper harness. This will require bars with a section of 100x100 mm. The upper structure is made according to the principle of the lower strapping.
- When the frame of the grill house is ready, you can proceed to the manufacture of the roof. For this, it is recommended to use bars with a section of 100x50 mm. It is more convenient to make a roof frame on the ground, and then lift it up and fix it. The octagonal hole at the top of the structure must match the diameter of the chimney pipe. To securely strengthen the frame elements in the upper part, it is necessary to make a metal part, the elements of which repeat the shape of the beams.
- Now you need to install the basis for the roofing material. To do this, eight triangular-shaped fragments must be cut out of OSB boards, corresponding in size to the sides of the roof.
- Using self-tapping screws, attach these parts to the top surface of the roof frame. Treat the gaps in the joints with mounting foam. The basis for shingles is ready.
- Fasten the roofing material on top.
- Now you need to create the floors in the grill house. First you need to mount a layer of insulation. For this, granulated expanded clay is suitable, which is poured between the lags. The thickness of the insulation must be more than 10 cm, otherwise the thermal insulation properties may disappear.
- Level the expanded clay. Install grooved boards on top of it. Like all wooden parts of the structure, this material must be pre-treated with antifungal impregnations and dried.
- Install window frames and doors.
- Insulate the walls of the grill house. To do this, it is necessary to install foam plates in the frame openings.
- Make interior and exterior decoration. What can grooved boards be used for?
- Install the brazier. Connect its elements to the pipe directing the air. Attach the hood to the chimney.
- Parallel interior walls grill house to put benches or seats. To do this, you can use bars with a section of 100x50 mm.
Do-it-yourself smoker-grill from a gas cylinder
The smoker grill is a universal design of interconnected thermal chambers for cooking meat and fish dishes, as well as vegetables and fruits. This unit combines a barbecue, smokehouse and grill.
The design of the smoker grill consists of:
- metal stand;
- furnace compartment;
- horizontal camera;
- smokehouses;
- chimney pipe.
The principle of the smoker grill is that hot air passes through all the chambers of the structure, leaving through the chimney. The hearth is located in the furnace part. This simple design requires careful preparation and drawing up drawings.
To make a smoker grill with your own hands, you need:
- Build thermal compartments. To do this, you can use old propane tanks of different capacities. The thickness of the walls will withstand high temperatures.
- Make covers for each compartment. To do this, using a hand circular saw, cut out rectangles from the cylinder body.
- Connect the bodies of the cylinders and the cut-out fragments with metal loops. To do this, you can use electric welding. The result will be functional covers to which you need to weld handles (they can be covered with wood).
- Having made cutouts in the cylinder body, connect them by welding. You should get a one-piece construction of a firebox, barbecue and smokehouse. Weld the chimney pipe to the last chamber from above. The smoker grill can be equipped with thermal sensors.
- Make a stand. To do this, you can use metal corners, pipes or channels. For ease of movement of the structure, its stand is equipped with wheels.
- For the combustion chamber, it is necessary to make grates. To do this, you can use metal corners with a margin of 10 mm or reinforcing bars with a diameter of 10–12 mm.
- For a barbecue, a grate with cells no more than 5 mm is needed, which can be made from similar materials.
Video: smoker grill and barbecue from a gas cylinder
 The very first power plant in the world
 Macaw lifestyle and habitat
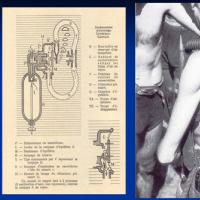 Denise's "diving saucer"
 Letter from Rosstat for free!
 We strengthen the signal of the Yota-modem Not a stable signal yota
 How to spend the Internet in the country without overpaying: tips and instructions Internet in the country what to choose
 Mobile Internet Skylink Purchase of equipment and SIM-cards