Equipment for macro photography. Equipment for subject shooting. Macro shooting with digital "SLRs"
The world around us is strikingly diverse and colorful, rich in details and patterns. You just need to take a closer look at it. More often than not, photographers are passionate about general views. In addition to event photography, among genres, landscape and, less often, still life are of particular interest. It has been noticed that if a foreground with its inherent relief and texture is present in a landscape picture, then the effect of presence is enhanced. And in a still life, it is almost always necessary to emphasize the detail and texture of objects. But there is a special genre in which close attention to individual objects and their details is inevitable due to the short photographing distance. This genre is called macro photography.
Among the notable advantages of amateur digital cameras - DSC, of course, is the ability to shoot from a distance of several cm. Even entry-level amateur DSCs can shoot from a minimum distance of 5 - 20 cm. close range without the use of additional accessories. Advanced DSC in "macro" mode allows shooting from distances up to 1 - 5 cm. Therefore, even beginners in photography can put into practice the many-sided advantages of macro photography. The photographer can capture rather close-up small objects - flowers, insects, coins, see the texture of wood and stone, "examine" the micro-patterns on the subject, which are hardly noticeable to the naked eye. In general, shooting from a very close distance is one of the effective creative techniques. A little experience with patience and you can get a variety of topics and impressive unusual images. Carefully peering into the natural world from a close distance, you can capture unusual shots with increased detail, rich texture of shooting objects.
About the scale of pictures in macro photography
In order to more accurately represent what actually refers to macro photography, let us turn to the concept of image scale. The scale is understood as the ratio of the linear size of the optical image of the object in the focal plane of the camera (i.e., on the film of a conventional camera or on the photosensitive matrix of the digital camera) to its real size. This ratio is also called linear magnification. It is generally accepted that macro photography is called the type of shooting in which the scale of the images obtained on photographic material lies in the range from 1: 10 to 5: 1, as described in the classic encyclopedia "Photocinema" (edited by EA Iofis, 1981). Usually macro photography used in scientific photography - geology, biology, medicine, etc. But now it is becoming one of the most popular genres of art photography.
Once again, we draw the attention of the reader that in the DSC the role of a photodetector instead of a photographic film is played by a photosensitive matrix, the dimensions of which determine the size of the frame. The size of the matrix in amateur digital cameras is 3-5 times smaller than the frame size of a narrow film, equal to 24x36 mm. The linear dimensions of the matrices used in the primary-class CPC, the average amateur and semi-professional are given in table.
table
|
Dimensions of the photosensitive area DSC matrices |
||
|
Size in inches |
Length, mm |
Width, mm |
The size of the photosensitive matrix of the middle and semi-professional grade DSC with a built-in lens is, as a rule, 1 / 1.8 or 2/3 inches. In reality, this means that a full-length photograph can be taken of small insects (bee, bug, bumblebee). Others will be carried away by shooting small household items, for example, jewelry, coins, badges, etc. On a smaller scale, you can photograph flowers, details of household items, or individual parts of the face.

The original scale of the optical image (on a photosensitive matrix) for the DSC does not exceed 1: 2.5 - 1: 5. It is obvious that the scale of the image on the print increases by the enlargement factor during printing. For a form factor of a 1 / 1.8-inch sensor (a common size for a mid-range DSC), the sensor size along the long side is about 7.2 mm. Therefore, for a print size of 15 x 20, the magnification ratio is approximately 28x and the image scale is approximately 11: 1 - 6: 1. Those. achievable magnification of the subject up to 10 times on a print with a moderate format. This means that on the print we are looking at the object as if through a powerful magnifying glass. Improved detail than under normal viewing conditions appears when the subject is viewed even on the DSC display monitor. When viewing pictures on a computer monitor, the magnification factor will be up to 50 times (depending on the size of the matrix and the size of the monitor).
More on Macro Cameras
So, for shooting especially close-ups, the DSC with a built-in lens is functionally intended, as it were, from the very beginning. To do this, it is enough to activate the "macro" mode by pressing a special button. This allows you to photograph small objects with a close-up plan from a distance of a few cm from the object without special devices. Some cameras even have two sub-ranges for macro photography- "macro" and "super macro". Super Macro lets you get even closer to your subject. However, most models are equipped with one macro mode. Nevertheless, some of them allow you to photograph from a distance of up to 1 - 2 cm. But, not very many DSC models provide a minimum focusing distance (MDF) within 1 cm. For example, Nikon Coolpix 5400 DSC, FujiFilm FinePix S602Z , FujiFilm FinePix S7000, Ricoh Caplio RR1, Ricoh Caplio RR30 and Ricoh Caplio G3.
A number of models from Nikon Olympus and Pentax allow you to photograph from a minimum distance of 2 cm. The minimum shooting distance for most of the DSC models in macro mode is from 5 to 20 cm. It can be noted that for amateur-class cameras, the MDF is mainly within 10 - 20 cm, for middle-class cameras - 5-10 cm, and for semi-professional MDF cameras it is often less than 5 cm.
In fairness, one important and curious detail should be noted. Cameras with lower MDF do not necessarily need to scale up. Linear magnification of the image depends on two parameters - the distance to the subject and the focal length of the lens. This dependence in both cases is linear, and the scale of the object increases both with an increase in the focal length and with a decrease in the shooting distance. So the linear magnification of the object can be even greater, although shooting is carried out from a greater distance, but with a long-focus lens. The fact is that the "macro" mode in digital cameras is usually available for a certain range of focal lengths of the built-in zoom lens. Most often, in many models, confident focusing in macro mode is possible for a wide-angle zoom lens, i.e. at minimum focal lengths. In this case, the macro mode icon turns green (or yellow). At other zoom ranges of the lens, autofocus is not performed and the icon becomes discolored. On select models, macro mode is available in the medium zoom range. And in very rare models, a macro mode with a wide zoom range up to the telephoto zoom position.
For example, for the Konica Minolta DiMAGE A200, the zoom ratio in the macro photography maximum at the longest focal position of the lens - the equivalent value of 200 mm. The minimum focusing distance (MDF) in this case is 13 cm from the front surface of the lens. The maximum size of the shooting area is 52x39 mm. The size of the photosensitive area of the matrix of this camera along the long side is 8.8 mm, therefore, the image scale is almost 1: 6. When shooting macro in the wide-angle position of the lens, the MDF is 21 cm from the front surface of the lens and the shooting scale is much smaller. Thus, this 13 cm MDF camera is a pleasant surprise for those who love macro photography. In passing, it should be noted that switching to macro mode for the DiMAGE A200 camera is performed using a mechanical switch located on the lens barrel.
Another remarkable feature of a digital camera should be mentioned - a large depth of field. In macro photography, not only the scale is significant, but also the depth of field of view - depth of field of the shooting objects. DOF depends on both the distance to the subject and the focal length of the lens. DOF increases with increasing distance to the shooting scene, but decreases with increasing lens focal length. To an even more significant extent, DOF also depends on the value of the set aperture. The higher the f-number value, the deeper the depth of field. It is known from the theory of optics that there is an inverse quadratic dependence of the depth of field on the focal length and a linear dependence on the distance to the object of photography. Thus, with the same shooting scale b O The greatest depth of field is provided by short throw lenses. The focal length of DSC lenses is several times shorter than that of film cameras. Therefore, the depth of field at the same shooting scale will be several times greater. (For the convenience of users, the real value of the focal length of DSC lenses is often reduced to the equivalent focal length for a lens of a narrow-film camera).

Optional accessories for close-up photography
The most essential accessory for close-up photography of stationary subjects is a stable tripod. Indeed, in macro photography in all cases, it is preferable to close the maximum aperture of the lens to ensure the maximum depth of field. A slow shutter speed that does not change with the lens aperture may result in blurry images when shooting handheld. Another important accessory is the remote control. This device will also help to eliminate possible camera vibration when you press the shutter release. To reduce blur when no remote control is available, it is useful to use the auto-capture mode. In this case, the shutter is released after 2 or 10 seconds. after pressing the trigger.
When shooting in nature, any unusual butterfly or bug, a tripod is hardly an assistant. In this case, when "prey" appears at an acceptable distance, the photographer must find the shooting point, take a stable position, choose the moment and hold his breath when pressing the shutter key. However, the optical viewfinder should be used with allowance for the effect of parallax shift when shooting at close range. It is best to trim the scene while looking at the display monitor.
As mentioned, optical macro lens attachments have been developed for some models of compact DSCs. Light filters at macro photography with digital cameras are of limited use. A polarizing filter may be helpful. It allows you to soften or eliminate reflections on glossy surfaces, and in some cases, improves color rendering. Light filters are installed on the lens barrel through a special attachment or directly on the threaded lens barrel mount.

Close-up lighting
A prerequisite for taking impressive photos is the right lighting. Through many years of practice, photographers have also worked out lighting schemes with various sets of flashes, diffusers and reflectors. In nature, natural sunlight is usually sufficient. You can use a sheet of plain white paper to further highlight shaded details. To reveal the texture of the objects being shot, the most acceptable is side lighting directed at an acute angle to the surface of the subject being shot. Therefore, morning or evening hours for shooting horizontal surfaces are preferable. This allows you to work out the texture of the subject well. But, in addition, it is advisable to make sure that the shadow from the camera does not fall on the object. Midday hours may be preferred when shooting vertical subjects. Please note that when shooting at very close distances, lighting problems may occur due to the shading of the subject by the body of the unit.
The scheme for constructing artificial lighting is similar. The pointed side light contributes to a good elaboration of the texture. When illuminating deep shadows, reflectors will also help. The use of the built-in flash is not always justified, as it usually leads to overexposure of the image and to the possible uneven illumination of the subject. You can, of course, set the mode of reduced flash intensity, but in this case it is advisable to install a diffuser in front of the flash. An example of such a survey performed by the Nikon Coolpix 990 digital camera is shown in Fig. 1.
For high quality macro photography digital cameras have developed special flashes. Of course, cameras must have a hot shoe or sync terminal. So, installed on digital cameras of the Nikon Coolpix series, the lightweight and compact MACRO COOL-LIGHT SL-1 flash allows you to macro photography without the use of sophisticated lighting equipment. The SL-1 has 8 bright LEDs that illuminate your subject. For Nikon DSLRs for macro photography There is also an SB-29s shadowless flash unit with flexible and independent intensity control for both modules.
Similar outbreaks have been developed by other companies. For example, Canon for macro photography ZFK developed MT-24EX dual flash and MR-14EX ring flash. Designed for Konica Minolta CPCs for macro photography Macro Twin Flash 1200 and Macro Ring Flash 2440.
Attention should also be paid to the choice of the background for the shooting scene. The subject should stand out well against the background, and the background itself should not be distracting. It is usually best to choose a uniform background with muted tones. White, gray and black backgrounds are applicable. Gray backgrounds are most neutral, while blacks enhance the perception of color nuances in subjects. Among the color tones, cold and dull colors are preferred. This creates the effect of bringing the subject closer. Warm and bright tones can give the illusion that the subject is farther away from the background.
The camera as a scanner for macro photography
One of the successful directions can be called the use of the DSC in the " macro photography"As a kind of simplest digital scanner. It is advisable to use the DSC for capturing pictures or text and for digitizing ordinary photographic prints. A useful activity is the reshooting of negatives or slides for the quick creation of a home digital photo library. For this purpose, special attachments have been developed (they are also called slide scanners), which are put on the lens barrel through an adapter ring. With a matrix size of 1 / 1.8 inches, the scale of a slide with a size of 24x36 mm is approximately 1: 5. Some digital cameras have a special shooting mode for a negative image. This allows you to immediately convert the captured negative into a positive image. However, for this purpose, you can use the capabilities of graphic editors, for example, the Adobe PhotoShop program. This makes it possible to neutralize the effect of the masking layer of the photographic film, which is practically verified by the author.
Using the DSC in the "macro" mode can be useful for creating a family electronic retro-archive. For example, for capturing small photographs from various documents (certificates of various organizations and societies, passes, etc.). After additional computer editing of old photographs, or rather their restoration, they are distributed in electronic folders. The convenience of using the DSC in the scanner mode is obvious, because you do not have to wait until the entire film is used up. Therefore, the archive can be periodically replenished with each new find.
Macro shooting with digital "SLRs"
Finally, let's talk about macro photography with DSLRs. Such cameras may also have a special "macro" shooting mode, but its effectiveness is questionable. The success of the business is decided by the same traditional method. macro photography, similar to the method macro photography conventional SLR cameras. There is a large amount of information about the methods and devices for macro photography with film cameras, which is contained in the numerous photographic literature. By analogy with digital SLRs, numerous accessories designed for macro photography can be used. These are positive attachment lenses that screw onto the lens; extension (intermediate) rings or attachments with stretching bellows installed between the camera body and the lens; teleconverters, also installed between a conventional lens and a camera. Of course, special macro lenses (lenses designed for close-up photography) can also be used.
The use of attachment lenses is justified only for macro photography with cameras with built-in lenses. Expensive branded teleconverters are advisable to use with long-focus lenses in the field for macro photography of relatively distant moving objects - butterflies, dragonflies, etc. Quality dedicated lenses for macro photography also not cheap. Depending on the size of the focal length, they allow you to shoot from a minimum distance from a few cm to half a meter in a fairly close-up. For stationary photography, it is easier and cheaper to use bellows or extension rings with conventional lenses. You can also use a wrap-around ring, which allows you to turn the shooting lens upside down, i.e. the front surface towards the frame window. This allows you to significantly increase the scale of the image and is technically the easiest to implement.

A little about the technique of macro photography
I will describe further the technique I use. macro photography SLR digital camera Nikon D70. I note right away that it was possible to purchase branded accessories specially designed for this. But since there was a domestic attachment for macro photography PZF with sliding fur, intended for use with cameras such as "Zenith", it was successfully used. It was additionally purchased only an adapter ring from the bayonet "Nikon" connection to the threaded "Zenith". But this was still not enough to connect the D70 to the PZF prefix. The protruding protrusion of the viewfinder interfered. Therefore, ring No. 2 from a set of threaded extension rings for "Zenith" was attached to the adapter ring. Then Nikon D70 with a set of adapter and extension rings was attached to the PZF attachment. On the other hand, a "Zenith" lens was installed to the attachment, but not directly, but through a special wrapping ring, to which the lens was docked through a threaded connection intended for light filters. It is necessary to explain to the reader that for macro photography a set of extension rings could also be used. But it is more convenient to work with the attachment of sliding bellows, since the magnification can be changed smoothly, and it is convenient to place the removed objects on the base of the attachment. In this case, the size of the optical image is obtained close to the natural size of the subjects of photography and larger. And for shooting with a lower magnification, just different extension rings from the kit were used. For close-up photography at a scale of no more than 1: 3-1: 5, you can use only the wrapping ring, which allows you to turn a conventional lens with its back side to the subjects.
Used when macro photography I used two high-quality domestic lenses - the normal "Industar-61L Z-MS 2.8 / 50" and the short-focus "Mir-1 2.8 / 37", which received the grand prize at the international exhibition in Brussels in 1958 (the second adapter ring from threaded connection to bayonet for Nikon's lens).
Since the optical system for autofocus cameras was not standard, shooting was performed only in manual mode "M" ( macro photography). In other modes (A, P, and Auto) the shutter did not fire and an error message appeared in the control panel. In this case, the exposure metering worked, but the exposure was automatically set incorrectly. The correct exposure was selected by the method of successive approximations. For this, the shutter speed and aperture were set using many years of personal photographic experience, and the test shot was analyzed using a histogram. The large and colored (orange) histogram on the Nikon D70 monitor made it easy to determine deviations from normal exposure. After some adjustments to shutter speed or aperture, the exposure was optimized. The original shooting scale was set in the range of 1.5: 1 - 2: 1. Focusing was performed by mechanically changing the distance between the subjects and the optical system.
For additional lighting with a strong aperture of the lens, I had to use a flash. Using the built-in flash was unsuccessful as the subject was heavily shaded. Therefore, I had to use an external flash. The branded flash units SB-600 and SB-800 recommended for the D70 were not available. As a result, an SB-28 external Nikon flash with a diffuser mounted in a hot shoe was used. The remote distance of the illuminator from the axis of the optical system made it possible to uniformly illuminate the object being shot. But still, in this case, the flash was inactive in TTL mode, and it only fired in A mode. But, apparently, due to the peculiarities of the optical scheme, the exposure also had to be corrected.
It remains to note once again the fact that for macro photography SLR cameras showed the advantage of digital over film. When building sophisticated optical circuits with adapter and extension rings, the metering system does not always work correctly. For film cameras, it is customary to enter exposure compensation using special tables that take into account the degree of linear magnification. But the result of the correction can only be determined after the film has been developed. The use of a histogram in a digital mirror allows you to quickly optimize the exposure.
The material presented in the article does not exhaust all the possibilities of macro photography with digital cameras. Nevertheless, the expediency and usefulness of this shooting mode for amateur photographers is quite obvious. Go for photography lovers.
The task is to develop a device that allows for macro photography of objects, insects, plants and other things in an automatic mode with a predictable result. Since the device is planned to be used with high magnification lenses, it is important to provide a focusing system with the smallest possible step (discreteness) of linear movement of the camera with the lens.
As you know, the depth of field of a picture at a high magnification of the object will be extremely small, for this purpose, the well-known method of shooting with a stack is used - a large number of frames with a shift of the camera with a lens. Subsequently, using special software, these images are combined into one with a huge depth of field.
Structurally, such a complex consists of a mechanical unit, control electronics, and a lighting system. The mechanical unit is designed on the basis of standard parts for CNC machine tools. These are 12mm steel support shafts, SC12UU bearing support, 1204 ball screw shaft 200mm long, NEMA17 stepper motor. All parts are mounted on a 12mm thick aluminum plate. The camera platform is also made of 12mm slab.
Subsequently, after the first tests, I decided to install a motor that is half the size. Even so, when powered by the 6V driver and motor, the torque was well placed to move the Canon 5DmarkII camera and large macro lens.

After the completion of the design work, it remained to assemble the installation. Alloy AMG3 with a thickness of 12 mm was used as a plate. I cut off the slab with a jigsaw, adjusted it, leveled it with a file, sandpaper.
He marked out all the project holes through a drawing printed on a transparent film. After the holes were drilled, they were tapped - M6 and M5. The holes were drilled with a conventional hand drill. Everything was assembled surprisingly precisely - the carriage moved perfectly, the ball screw, after mounting the mount on the movable block, it rotated easily.


Using ammonium persulfate and ferric chloride, I etched my nameplate out of brass. The template was applied to the brass using a laser printer toner and a converted laminator.

After the mechanical assembly was assembled, I happily rotated the camera back and forth with the strongest homemade macro lens I have - based on two 75-300 lenses and a wide angle lens. Thus, I evaluated the centering accuracy from the beginning to the end of the movement of the camera aimed at the test target. The result satisfied me and I began to think in stepping motor control software.
Since I am not a programmer and have no relevant experience, I accordingly had to turn to the FlowCode visual programming program. In a short time, I managed to make a primitive code for the Attiny13A chip, which controlled the L298 driver board. In the simplest, initial version, I needed to move the camera by the required amount of half-step, then pause, release the shutter of the Canon 5Dmark II camera, after which the program cycle should be continued until the desired point was reached.

As a result, after I was convinced that the timing characteristics in the program were set correctly, I decided to try the device in practical application.


Next, you need to arrange the control electronics unit in the form of a single case. Later, I plan to develop the next part of the automatic complex - a lighting system based on xenon flash lamps operating in reflected light and a power capacitor pump generator. At the moment, test shots have been taken using constant LED lighting with a total power of 60 watts.
This method has significant disadvantages - the huge heating of LED crystals requires the use of very large heat sinks. LEDs work in reflected light to obtain the desired diffuse illumination, respectively, the luminous flux of LEDs is insufficient for shooting with high magnification. It is possible to get rid of these problems by using several (3 or more) flash xenon lamps; selective positioning around the subject will allow achieving the desired type of lighting.
Macro and close-up digital photography opens up new possibilities for your digital images. Wherever you see landscapes and portraits, you can now turn your camera into a tiny bug crawling on the ground or a mole around your subject's neck. You get intimate images that show the world anew. But you need to overcome new challenges for that to happen.
Equipment for macro photography and macro photography
To achieve macro and macro photography results, you need to focus on objects at a closer distance. To get close to your subjects, you will need special macro and large scale equipment and techniques. Here are some of the ways that close-ups and close-ups get the shots you want:
Use a fixed lens with macro photography... Unlike conventional lenses, macro lenses allow you to shoot very close to your subject while maintaining sharp focus. Most macro lenses will zoom you in to capture a 1: 1 magnification ratio. This means your subject is displayed life-size on your camera's digital sensor.
Use an extension tube to complement your lens. Extension tubes are hollow accessories that connect between the camera body and the lens. They provide space between the lens and sensor, allowing you to focus closer than usual. The relationship between extension tube size and lens focal length determines how close you can get. A 50mm extension tube paired with a 50mm lens provides a maximum 1: 1 ratio, however a 50mm extension tube paired with a 100mm lens provides a maximum 1: 2 ratio.
Attach teleconverter to the lens to increase magnification. Teleconverters are optical devices that connect between the camera and the lens. They magnify the image created by your lens to magnify it on your camera's digital sensor. When using the tele-converter, the image is enlarged, but you do not need to get close to the subject. This makes teleconverters ideal for photographing subjects that are easily scared or in hard-to-reach places.
Rotate the lens to increase your ability to focus close to your subjects. By separating the lens and rotating it (so your camera views the front element and out of the back element), you can get closer to your subject and achieve greater magnification. Try this method by simply holding the lens in front of the camera. If you are happy with the results, consider buying a ring. shifts (an accessory that allows you to fix the facing lens to the camera body) to hold the lens in place.
Lighting for Macro and Macro Subjects
Macro and macro photography usually require you to be very close to your subjects. This can be problematic when it comes to light, as your camera lens (or your head) can cast a shadow on the scene or subject. The closer you are to the subject, the more likely you are to block out the light.
When working with natural lighting, choose scenarios in which the subject is lit from the side, there is an ambient type of light, or the subject is backlit. The front lit situation forces you to be between the subject and the light.
When your scene doesn't provide the ideal lighting situation for a shot, you can take matters into your own hands:
Use a reflector to reflect light in your scene. This will help you control the direction of the light and ensure that your subject is not in shadow. You can use any surface that reflects light, such as a mirror, a white piece of foam core, or a shiny metal surface.
Keep a small battery-operated flash in your camera bag. The flash allows you to illuminate objects in any direction. Just make sure you have the proper setup for triggering the flash from the camera, as the on-camera flash is somewhat useless in macro and macro situations.
Attach the macro lens signal to the lens. A ring of light surrounds the edge of the lens for even, even light in close-up scenes. This allows you to illuminate your subject from the front without worrying about casting your shadow on it.
Depth of field control for close-up and macro photography
High magnification levels mean your depth of field is naturally shallower than usual. This can be fine when you really want to emphasize your subject, but if you want more depth of field, you need to adjust.
If you want to use a shallow depth of field to compose with selective focus(only one spot in the image appears with sharp focus), you can use a large aperture setting (eg f / 2.8). Your focus needs to be accurate in this situation, so it appears exactly where you want it. Use a tripod to stabilize the camera; this will ensure that your focus point does not move after you set it. A guide rail(a device that allows you to move the camera with precision to and from your subject) can help you control your focus point.
If you want to increase your depth of field, you need a small aperture (like f / 22). This type of aperture allows in a small amount of light and requires you to use slower shutter speeds in order to properly display your scene. A tripod helps hold the camera during exposure by eliminating motion blur that causes camera shake.
Improving macros and macro photography in post production
All is not lost if you don't get the perfect shot. Postproduction photo editing software allows you to enhance macro photography and macro photography of digital images, as well as correct minor errors that occur during shooting. By learning how to use this type of software, you can make your shots popular and achieve technical excellence.
Sharpening The post-production image helps create sharper edges and can be used to enhance an already crisp image, or to correct an image that was slightly out of focus. (This tool is not a miracle worker, so remember that it is always better to shoot an image with sharp focus than relying on the sharpness of aftermarket preparation.) Be careful not to sharpen the image, which causes a halo to appear around your edges - a sure sign for viewers that you are used a sharpening tool.
Adjust the exposure by enlarging or darkening the image in post-production. You can make minor adjustments or correct a mistake. But like most post-production methods, adjusting the exposure too much can result in a significant loss in image quality and may seem obvious to viewers. You can use Curve Adjustments to adjust exposure in certain areas without affecting others. For example, if your highlights look great, but your shadows look too dark, raise the curve's shadow area while keeping the highlight area as it is. Do this to brighten your shadows without affecting your highlights.
Touch up imperfections to remove distractions. When your focus is very close to the lens (in particular if you are using a small aperture for a large depth of field), lens dust will often show up clearly in your photograph. Any dust, scratches, unwanted hotspots or shadows can distract the viewer's eyes from your subject or make the image look dirty. Most photo editing software offers many tools that allow you to define, clone, or retouch an image. Use these tools to eliminate imperfections and distractions to keep viewers engaged.
- Sean, you kind of cut one frame from the last tape. Please answer, could you say, forget to send it to me?
- are you talking about the latest photo?
- Yes.
- about the twenty-fifth?
- Yes…
- you sit on it.
2014 (C) "The Incredible Life of Walter Mitty."
So I sat for a very long time, not noticing that there was an excellent lens under me! More precisely, not the lens itself, but, so to speak, the macro ring. We are talking about an armchair, the repair of which I wrote about six months earlier. And again a mallet with a knife was used ... I already had a lens, it seems from an overhead projector, but how to fix it on the lens was not clear before. The ideal option for the adapter turned out to be a casing from a chair gas lift! Moreover, one of the knees was perfectly stretched over the lens, and the other was perfectly attached inside the thread made for the light filter. I chose the second option. All the work was reduced to cutting off the ring of the desired height (about 3.5 cm). A lens wrapped in one layer of black electrical tape fits tightly inside the ring. In general, everything is simply impossible, and you do not need to spend thousands on optics. The quality of the images is certainly not for glossy covers, but I think it's better than buying a reversible ring. the diaphragm cannot be controlled with it. And when shooting, you have to cover the aperture, and the more, the better. Someone might say that the edges of the image have terrible distortion, on the other hand, distortion and chromatic aberration can be considered a kind of effect. It's like in music, someone struggles with distortions of sounds, while owners of electric guitars, on the contrary, try to amplify them. It turns out to take pictures from a distance of 3-5 cm. To remove blur at the edges, you have to cover the diaphragm completely. Therefore, the shutter speed increases, and you need to photograph with a tripod, or in very bright light.
This is what a nozzle looks like from an uncut casing. Now you can safely go out with a camera and scare away passers-by, but there is no practical use for it due to the overlap of the entire view by such a pipe. As a result, in all the photos we get a bright light at the end of the tunnel ...
And here is already a cut off ring of the required width. The edges of the pipe can now only be detected at the minimum zoom.
Working photo attachment in action
Macro photos taken with the attachment:
The greatest distortion is noticeable when shooting geometrically correct objects.
Fans of close-up photography can easily find on sale so-called reversing rings, which allow you to mount the lens on the camera with the reverse side. Only in spite of the simplicity of the design, they ask for immodest money for this accessory ... Why give your hard-earned money if the problem can be solved with a piece of ordinary wire? You will not see any difference in the pictures.
In contrast to using an attachment, an inverted lens allows you to take the photographed objects in a larger shot. This is what a laptop display looks like. I did not crop the frame, but, on the contrary, reduced the image. Those. when viewed at full scale, the pixels are gigantic!
Any cameras that allow you to extend the lens and obtain an enlarged image of the object are suitable for macro photography. Macro photography is carried out both with small-format cameras for general photography, and with special
stationary devices. In expert forensic laboratories, the installations "Belarus" (SB-2), "Ularus", "Ularus-2", FMN-2 are used.
One of the advantages of large-format cameras over small-format cameras is the clarity of preparatory operations. From the image of the object on the frosted glass of the sight, one can assess the sharpness and distinguishability of details, analyze the distribution of light and shade and the limits of the depth of field.
Modern macrophotographic and reproductive devices are different in design, but not in the principle of the device. Their indispensable elements are a subject table (original holder), a rod (tripod), a bracket with a camera and illuminators.
A camera, as a rule, consists of two main parts: the lower (objective) for attaching the lens and the upper (cassette), on which a sighting device or a cassette with photographic material is installed. The lower and upper parts are connected by fur made of opaque fabric and move independently of each other. To obtain large-scale images, the stretching of the camera fur should be at least two focal lengths of the lens.
Universal photographic installation SB-2 (Belarus) is intended for shooting various objects in scientific and technical research, as well as for obtaining prints from black-and-white and color negatives. It allows you to reproduce documents, printed publications, drawings, etc., to carry out macro photography of small objects. In combination with biological microscopes, it is also suitable for photographing micro-objects.
The installation is equipped with two cameras: a large format - 9x12 cm and a small format - 24x36 mm. Its set includes the lenses "Industar-55U" (4.5 / 140 mm) and "Industar-58" (3.5 / 75 mm), which allow photographing objects at a scale from 1:10 to 7: 1. The Industar-58 lens (3.5 / 75 mm) is intended for a small-format camera. The Industar-58U lens (3.5 / 75 mm) and a 114 mm condenser are intended for printing from negatives with a format of 24x36 mm and 4.5x6 cm, and the lens “Industar- 55U "and a condenser with a diameter of 170 mm.
The main units of the installation are shown in Fig. 100. On the table 4, the main 1 and auxiliary 9 rods are attached, along which the bracket 8 with the camera 2 moves, balanced by the weight inside the main rod and connected to the bracket with a cable thrown over the block. Changing the position of the camera relative to the table is achieved by rotating the handwheel 3 to move the bracket along the rod. During shooting, the bracket with the camera is fixed firmly with a tightening screw.
Rice. 100. General view of the installation "Belarus"
For photographing objects, the installation is equipped with four soffits 6, installed in pairs on both sides on the rods 7. The position of the spotlights is changed by horizontal movement along the brackets 5 or vertical along the rods 7, as well as by changing
We will see the angle of their inclination to the table surface. In the desired position, the soffits are fastened with clamps and clamps.
The camera of the installation consists of a body 12, a fur 4, an objective bracket 5 and a mechanism for stretching the fur. The camera body in a vertical position is fixed on a movable bracket 10 by means of a pin connection and a tightening screw 11. When photographing large documents for reproduction, the camera is rotated 90 °. The document is then attached to the wall of the laboratory and illuminated with special spotlights (Fig. 101).
 Toucans Where does the toucan live on which continent
 Enlarging the image without losing quality
 Presentation of electroscope conductors and dielectrics electric field
 Discharge from the hospital Gifts and souvenirs upon discharge from the hospital
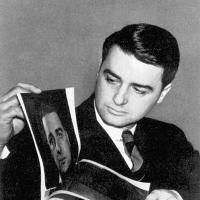 Why Polaroid Sunglasses?
 Polaroids - what are these glasses and what do they eat with
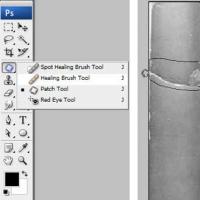 Restoration of old and damaged photos Restoration of old photos in Photoshop