How to shoot and edit night photos. Night portraits without a tripod and flash How to photograph at night without the flash of people
Let there be many beautiful photographs in your life, including portraits of men! You've probably come across the question more than once: how to get a man to pose for a photo? And here's the answer!
Use 10 Proven Tips for Shooting Male Portraits and the result will make your models beg you for another shot!
#1. Male poses are characterized by curves and sharp angles. Ask your model to lean on her elbows or fold her arms over her chest - this gives the man an angularity that emphasizes courage. Male portraits are great from a direct angle: legs wide apart give a man self-confidence.
# 2. A very common problem for men: nowhere to put your hands to . The easiest way is to ask the model to put their hands in their pockets so that their thumbs are visible.Another way: give the man something to keep him busy. It can be a cigarette, keys, glasses or any other accessory.
 # 3. Transferring weight to one leg helps relieve tension. You can offer the model to cross her legs, transferring her body weight to one of them. In this case, you can lean against a wall or column. A large portrait can be shot in a seated position, then the emphasis will be on the expression of the face and eyes, and not on the pose itself.

#4. It doesn’t hurt to have a telephoto lens with you
.
Men are very jealous of their personal space. In order not to disturb it, it is better to use a long-focus lens. With it, you can make cool portraits without getting close to the model and without straining the person being portrayed.
#5. If the image of a man is simple, you can play with the background. Men usually dress discreetly: in black, gray, dark blue. When shooting outdoors or indoors, you can use a bright background and play with contrast.

# 6. For fun photos, provoke emotions
.
While shooting, talk to the model about what is interesting to the man being portrayed: about his hobbies, work or favorite beer.This creates an atmosphere of confidential communication and allows you to capture genuine emotions: laughter, indignation, delight.
# 7. You can use tricks to get interesting shots. Say that the first few shots are trial shots, the person will feel more at ease. Often the first photos are included in the set of successful shots. One good technique to get a good look directly into the camera lens is to ask the model to look at some point and then into the lens. At this moment, you need to press the shutter button.

#eight. Do not forget about the posture of the man. . V regardless of whether the model is sitting or standing, you need to pay attention to the posture. If a man forgets about posture, you should delicately remind him to keep his back straight.... Slouching is rarely photogenic.

#nine. And teenagers can fool around!
They can be shot on rollerblades, bicycles and skateboards. Or even lay the guy down on the pavement.If your teen doesn't need to look serious and courageous yet, you can experiment with angles and shooting points.
#ten. The male portrait is being processed in black and white.
To emphasize the brutality of facial features, you can use hard light and black and white photo processing.This works especially well with dark-haired men with well-groomed facial hair.
We've made a selection of black and white male portraits for you on Pinterest.
3001
Polina Maslenkova
Can I take pictures in public places? Is it possible to photograph strangers on the street? You will find answers to all these questions in this article.
heading: Advice 31.01.2018
Andrey Barilo
heading: Council Phototechnics 08.02.2018
Polina Maslenkova
Not every apartment is suitable for filming the gathering of young people: after all, a photo against the background of unstuck wallpaper, a full-length Soviet section and old-fashioned curtains is unlikely to decorate a wedding album and portfolio of a wedding photographer.
heading: Inspiration Council 02/14/2018
Oleg Nasytko
On February 10, a workshop on wedding photography was held on the Minsk Sea, organized by a photography school as part of a master class by wedding photographer Artur Shakh-Huseynov. How it was in our photo report.
heading: Training Photo report 03/01/2018
Polina Maslenkova
We talked with our leading teacher of photography in Grodno Olga Pavlovskaya, who became a child and family photographer with the birth of her own children and now seeks to turn every shot from childhood into a fairy tale with the help of her skills.
heading: Interview 03/05/2018
Polina Maslenkova
How to twirl the background in a photo and separate the main subject of the frame from the background? In this article, we'll share five ways to create a cool swirling background - use it!
heading: Instruction Council 03/25/2018
Oleg Nasytko
If you want to shoot the bride's morning in an unusual and fresh way, then bathing in a milk bath can be your original find!
heading: Photo report 04/03/2018
Oleg Nasytko
How to use the favorite mode of portrait photographers, play with depth of field and blur the background beautifully, we will tell in this article.
heading: Instruction Council Phototechnics 05.04.2018
Artur Shah-Huseynov
These were two incredible days full of filming of newlyweds in interesting locations of the city and Pidhirtsi Castle in the vicinity of Lviv.
heading: Photo report Photo tour 09.04.2018
Polina Maslenkova
What is considered good manners among photographers? And what should a photographer not do at all? What are the duties of a photographer prescribed in the documents, and which ones relate to the field of morality and ethics? Let's understand the material.
heading: Advice 11.04.2018
Oleg Nasytko
What to look for when choosing a camera, and what characteristics can be neglected? Keep your camera guide from a professional!
heading: Instruction Council 04/17/2018
Polina Maslenkova
May has come - a wonderful period of flowering and photographing dandelions! If now only 3-4 frames came to your mind, then it's time to push the boundaries of your imagination!
heading: Inspiration 05/03/2018
Polina Maslenkova
Choosing clothes for a photo shoot is not an easy task, because even the most beautiful blouse combined with a partner's pants or the background of a location can look awkward. To avoid this, follow simple rules.
heading: Advice 15.05.2018Greetings to all photography lovers, young and old! Continuing my series of articles on studio photography, today I will tell you about a man's portrait: what a "classic man's portrait" is, what kind of lighting is used to make a man's portrait interesting, and of course about the most interesting lighting schemes that allow even the inexperienced photographer (with due diligence) get amazing results!
I will assume that each of you, dear readers, has some experience in photographing the male half of humanity - well, who has not made portraits of their friends, relatives, acquaintances? :) But does everyone know what a classic male portrait is, how it should be? When shooting such a portrait, it is important to convey the masculinity of the model, his personality and look. And you also need to be able to focus on the character, mood, relief of the face and body of a man. "Wow, how many all sorts of troubles with a man's portrait!" - the beginner will certainly be surprised. Do not panic, I assure you, everything is much simpler than you imagined there.
It's time to open the veil of the mystery of creating a male portrait, because since you are reading this article, you also want to learn how to take such photos, where all of the above elements will be present - both masculinity, individuality and everything else. So, use hard light and play on the contrast of light and shadow... That is, no two-meter octoboxes half a meter from a man's face! (The closer the light source is to the subject, the softer the light and shadow pattern.) Just leave all that soft light “gags” for female beauty portraits :)
Of course, as in other areas of photography, there are also exceptions in the creation of a male portrait. For there are specific tasks when you cannot do without a soft box that generates soft light. And I will definitely tell you about these exceptions to the rules - stay tuned for new materials.
So, we create a male portrait in the studio, and use hard (drawing) light for this, for this it is most logical to use special light-shaping nozzles, here are the most popular ones:
- portrait dish
- reflector
- reflection umbrella
However, if you take an attachment that forms a diffused light (soft box, white umbrella in the light or octobox) and move it along with the monoblock farther from the model (sometimes two meters is enough, it all depends on the size of the source) - you will see that the softness chiaroscuro changes in the direction of rigidity, and now we have sharply outlined lines of light and shadow on the face of the model. This means that in order to create spectacular portraits with painting light, you do not have to be limited to just using reflectors or portrait plates.
What lighting schemes are suitable for the task of creating a beautiful portrait of a man in a studio? I will give, in my opinion, the most interesting solutions in examples.
(ss) Daniel Zedda
how it's done:

Perhaps this is the most classic scheme. Also called the "triangle" - notice the distinctive triangle of light on the less-lit side of the face.
Here the light source is a candy bar + a white umbrella in the light, located about a meter from the model, the height of the candy bar is about two meters. This is a great example of how you can achieve a relief, interesting cut-off pattern with one light source, as well as organically highlight the white background behind the model. Due to the fact that the source is close to the background, a pleasant natural vignette is formed at the edges of the frame.

(ss) David Pichot
how it's done:

The light sources here are two monoblocks with reflectors, they are located on both sides of the model, at a distance of about two meters each. The height of the right pillar is at least two and a half meters, the light source on the left is much lower, at about a height of one and a half meters. The impulse of the reflector installed on the right is about one and a half to two times more powerful than the second one on the left. Note! The model stands three-quarters of the way relative to the camera and thus illuminates both the left and right sides of the face and body.

(cc) Joshua Hoffman
how it's done:

There are two light sources here: monoblocks and white umbrellas for the light. The first candy bar is located behind the camera, in front of the model, it creates moderately hard light. Moderately hard due to its remote location from the model (at least two meters), with a rack height of about two and a half meters, it gives a very balanced pattern - the shadows are distinct, while there are no gaps in the shadows. The second light source is located behind the model and illuminates the dark background, adding volume to the shot and also acts as a backlight source, slightly highlighting the silhouette of the model.

(cc) studio.es
how it's done:

This scheme may seem a bit tricky, but it's actually quite simple. Two light sources were used here - these are monoblocks equipped with reflectors. The first monoblock is located approximately three meters from the model to increase the rigidity of the luminous flux. The second candy bar illuminates the background and adds volume to the frame. I also used black panels on either side of the man to further increase the contrast between light and shadow.

(ss) Daniel Zedda
how it's done:

The semi-shadow scheme (only one half of the face is always lit in it) is very popular among professional photographers. The author used only one light source - a candy bar paired with a white umbrella in the light, placing the source to the left of the camera, at a distance of one and a half meters from the model, and raising the candy bar to a height of about 2.5 meters and turned towards the model. As a result, this source gives an overhead light, with a moderately contrasting pattern on the model's face + it illuminates the background with a pleasant light spot, separating the man from the background. Note! Dark clothes and a dark background enhance the contrast, focus the viewer's attention on the main thing - the look, the texture of the skin and clothes, emotions. By the way, the attentive reader will most likely notice that this lighting scheme is similar to the first, but there are some differences. Here the light source is much higher and to the left, which is why the results for the examples are so different.
As you can see, to create a male portrait, it is first of all important to create the right lighting. The above examples, as you understand, are just a small part of all kinds of techniques and ways to capture a man in a photograph as he is - strong, courageous, charismatic, enthusiastic, etc. And looking at these photos, it becomes obvious that even with only one light source in your arsenal, you can achieve very impressive results!
As you know, photo sessions with the participation of men are much less frequent than photo sessions for children or women. Most often, men do not tend to show themselves in front of the camera, many of them, unlike the representatives of the beautiful half of humanity, are not very concerned even with their appearance, they have no particular desire to show off in front of others.
How can you turn a male photo shoot into an exciting creative process? How to make it more comfortable for both the photographer and the person being photographed?
When preparing for work, the first step is to choose for your model as many diverse and attractive clothes as possible, moreover, preferably different style directions, so that when shooting you have something to choose from. Plus, clothes can sometimes tell you the character, the style of the future portrait. Don't forget to keep your model's clothes familiar and comfortable. This will help the person to be liberated.
Don't forget about the props. In the portrait of a man, very different things can be present, here your choice is not limited by anything. It can be a laptop, a guitar, a glass of wine, a ball, or a tennis racket. The main thing is that all these objects help you express the inner world of the person being portrayed.
Even before the start of the photo session, it is important for you, the photographer, to understand what the customer wants to receive from you, what is important for him to see as the result of all your joint work. That is why it would be good to discuss all possible shooting options in advance, even a few days before starting work.
The photograph that you plan to take for your client should express the status of a man, should emphasize his dignity and hide possible disadvantages. More often than not, men want to look brutal, sexy, courageous. All this must be taken into account. You can even show him this article with photos as a cheat sheet.
Many men prefer black and white photography. A black and white photograph emphasizes the masculinity of your model, his masculine heroism, power, strength. Many photography professionals who work with men say that their clients feel more confident, comfortable, and cozy while shooting if they are in a trusting relationship with the photographer. In this case, it is much easier for them to be liberated, to be natural. Although it happens quite the opposite. This is why it is important for a portrait photographer to be a good psychologist as well. He just needs to study the psychological portrait of his model, learn as much as possible about this person, about his work, favorite sports and other affections and hobbies. It would be nice to know his musical preferences, and to put on the client's favorite music while photographing.
In a male portrait, poses look interesting, which can be called the most simple and natural. The simpler the pose, the more natural the portrait will be. The male pose is usually called a pose in which right angles are visible and there are slightly more vertical lines than horizontal ones. In order to effectively show the muscles and broad shoulders of the model, ask your client to turn their shoulders towards the camera, and, on the contrary, turn their hips slightly away from the lens.
It is customary to build the composition of a male portrait so that the model's eyes look in the same direction as his face. Regardless of whether the subject is standing or sitting, special attention must be paid to his posture. If your customer has forgotten about this, you need to delicately remind him of this. The back in the portrait should be straight. Well, the introductory part of our conversation is over, it's time to start talking about specific poses for creating good portraits of good men.
The first pose for a male portrait is very simple: the model is standing with her arms crossed on her chest. In this pose, you need to pay special attention to two details: the subject's stomach should be tucked up, and the shoulders should be pulled back a little.

The second pose is similar to the first. She is good for a full-length portrait. The subject should cross his arms over his chest, and so that his hands are on the elbow bends, and the thumbs are hidden inward. When photographing a man in this position, you can ask him to cross his legs as well, and this must be done so that one leg is in front of the other. Here you need to pay attention to the fact that the body weight of the model was transferred mainly to one leg, otherwise the pose will be awkward and ugly.

This pose may even slightly repeat the previous one. The only difference is that the model put one hand in the pocket, and the other remains in a relaxed position. The same pose can be slightly modified. Ask the subject to put some or all of their hands in the front pockets of their trousers. And immediately the posture of the person will become natural, the man will look relaxed. There are two options for this pose. First: the hands are folded into a fist and are located approximately at the level of the waist, and the thumbs are in the pockets. Second, the hands are hidden in the pockets, and the thumbs are outside.

Very good full-length portraits are obtained if a man stands with his back against the wall. In this case, it is good if his hands are in his pockets. And if one leg of the subject, bent at the knee, also rests against the wall, then the photo will turn out to be natural and relaxed. If your goal is to photograph a man sitting, then ask him to put the ankle of one leg on the knee of the other. In this case, the pose will be natural and familiar to a person. In this case, the shooting point should be slightly higher than the eyes of the subject.

A man can lean against the wall and sideways. Such a portrait can be both improvised and official.

One of the simplest options to show a resting man. The model is depicted sitting in a free and natural position for him, while his hands lie freely on the hips.

Pose for a person sitting at a table. It's pretty straightforward. At the same time, one hand of the model lies freely on the table, and the other, clenched into a half-fist, supports the chin. Well, in order to indicate the occupation or profession of this person, you can include any objects in the frame. Let them lie on the table in front of him (telephone, business papers, writing utensils) or be located somewhere in the background (for example, books in the closet, something hanging on the wall ...). In this case, all these things and objects will work as signs.

A variation on the previous pose is good for portraits of business people. One hand is still on the table, the other, with an elbow on the table, is raised up and the fingers of this hand are in a bent position. At the same time, the model tilted her head slightly and looks directly into the lens. This pose makes the man more creative. The model is still sitting at the table or just in a chair, while the chair or chair is slightly turned back towards the lens. One hand of the model rests on the handrail of the chair or on the table with an elbow, and the hand of the other hand rests freely on the second handrail.
The portrait is sitting at a table, leaning on crossed arms. On the table, as always, you can put various objects indicating the profession of the person being portrayed.

A chair as a support for a standing man will make his portrait much more attractive and interesting. Instead of a chair, you can use a windowsill, a table, or something else. There are some variations you can make to this pose. For example, ask the subject to stand with their hip resting on the edge of the table. In this case, the legs can be crossed. Hands can be crossed over the chest, or they can be resting on one of the supports mentioned here.
The person sits freely on the ground. The pose is simple and natural. You can experiment with its various options, changing the direction of the model's gaze, shooting points, angles. There are a great variety of options, full scope for the flight of the photographer's creative imagination. Another similar pose. Also on the ground. More precisely, somewhere in the forest, on the grass ... The portrayed person leaned back a little and rests his hands on the ground. Free and natural posture.

Also sitting on the ground. The young man sits with his legs crossed in front of him, on which his arms are crossed. Everything is simple and lyrical. Sitting on the ground again, but not on the grass, but somewhere in the city, on the asphalt. The pose is relaxed and informal. The man sits with his back against the wall of a building, fence or some other support. At the same time, his legs can be either extended or slightly bent at the knees, or one leg bent at the knee. And here, too, there are a huge variety of options.

And the last thing. Don't be shy or afraid to take close-ups of your clients. Let there be only one face of the model in the frame, or even part of the face. This will make your subject the main thing in the photo, focus on the eyes or some other bright personality of the man. Close-up portraits can be great!

Well, in conclusion of this article, I would like to remind you that the naturalness of your model in front of the camera is the main guarantee of success, the guarantee of creating a good and competent portrait that reflects the whole essence of the person who is depicted on it.
By capturing people at night without a flash, you can gain invaluable natural light photography experience. Most people think that as soon as it gets dark, you should start using the flash, but natural light from streetlights, lamps, shop windows, etc. will give your photos a more interesting look. Pictures taken at night without using the flash will appear more natural.
There are two main areas of night photography - this is night portrait and street photography... The main task of a night portrait is staging. This gives us control over the movement of the object. In street photography, we will not have control and here it is better to use shutter priority to avoid unnecessary blurring. Let's take a look at several ways to photograph at night.
How to photograph a portrait at night.
So, for shooting a night portrait, we need a tripod and a release cable or any other device for remote synchronization. They will help you avoid unwanted camera movements when shooting with long exposures. Provided you have everything you need, you can start shooting in low light.
The main prerequisite for long exposure photography is a camera firmly mounted on a tripod and a cable release or a shutter release timer. This will eliminate camera movement that causes blur in your photos. Any lens can be used under these shooting conditions and shoot at very low ISO settings.
Night paparazzi

Street photography at night is a very difficult task for a photographer as you cannot control the movement of the object. Therefore, you must shoot at a high shutter speed in order to have time to stop the movement. This requires high sensitivity and a fast lens. The sensitivity in the camera is adjusted using ISO, and the higher the value, the less light and time it takes to properly expose the picture. High ISO settings increase noise and deteriorate photo quality.
High-aperture lenses are lenses with an aperture equal to F1.4 - 1.8. The more we open the aperture, the more light passes through the shutter when shooting. To photograph a person in low light in a resting position, for example, if he is standing, then you will need a shutter speed of about 1/15, for a person who is already moving 1/60, for a walking person somewhere around 1/125, but to force stop a moment, filming a running man - 1/500.
Measurement
Manual or semi-auto modes set in the camera will provide better results than auto mode when shooting at night.
When shooting at night, you can end up with a lot of dark areas in the photo, which is not at all interesting for us. To avoid this, try manually adjusting the shutter speed and aperture, or you can use spot metering, which will give a more accurate result and help you understand how to properly shoot in the dark. In general, when shooting at night, there is no "right" or "wrong" exposure. Each photo will have its own individual settings, depending on the goals that you are pursuing.

Creative blur at night
Smearing is obtained when the object is moved. Most often we try to avoid this, but sometimes we need to leave this moment on the contrary in order to "revive" your picture.

Paint with light
Painting with light or painting with light is used as an addition to existing techniques. To do this, they usually take a small flashlight and direct the light onto the subject.


White balance (B B)
The main type of lighting at night is conventional incandescent bulbs, which produce warm yellow tones. Fluorescent lamps will give green color. For some photographs, colored light will be part of the mood; they do not need to be edited. But often such a light spoils the image, then it is necessary to correct the white balance. For night photography, it is best to use the RAW image format. In this format, it is easy to fix WB without losing image quality.
Knowing how to manage your light sources at night is a major challenge in getting great shots. It's not easy, but skill comes with practice. Learn to overcome these difficulties and you will succeed in night photography.
Are the movements of your hands holding the camera ruining your nighttime portraits? Use our four tips to fix this problem and get a beautiful, blurry yet well-lit shot. No advice includes using a tripod. This is the magic!
EOS 5D Mark II / EF35mm f / 2 IS USM / AE with aperture priority (f / 2.0, 1 / 30s, EV -0.7) / ISO 400 / WB: Auto
Equipment: use a light and fast lens
A fast lens, also known as a "light" lens, refers to lenses with a large maximum aperture, such as the EF35mm f / 2 IS USM, which was used for the shot above. Store lamps were the only light source, but the lens' maximum aperture allowed more light to reach the sensor without slowing the shutter speed excessively (in this case, 1 / 30th of a second). There was no camera shake or subject blur in the resulting image.

4 Steps to Getting a Sharp Night Portrait Shot Without a Tripod
Step 1. Set the mode dial to Av mode. Set the f-number to its lowest value.
Unless you have a specific photographic intention (such as painting with light), shoot in aperture-priority AE (Av) mode and use the widest aperture. Using a narrower aperture slows down the shutter speed (lengthens the exposure time), which increases the likelihood of a blurry image. Most techniques with slow shutter speeds (like light trails) will require the use of a tripod.
Step 2. Increase ISO sensitivity.
Raise the ISO value according to the brightness of the shooting location until you get a shutter speed sufficient for handheld shooting. Generally, when using a 35mm lens, the shutter speed should be around 1/30 of a second or faster. If you set ISO to Auto, the camera's selected ISO sensitivity may be too high, resulting in a grainy photo. If you want to ensure impeccable quality, it is better to set the ISO manually.

To ensure that ISO sensitivity does not get too high in ISO Auto mode, no matter how dark the settings are, set the maximum ISO sensitivity to Auto. This will give you more control over image quality.

Step 3. Find a light source
Even in low light conditions, you still need some. In the examples presented, the photographer positioned his model at the doorway of the store and used the light coming from the inside as the main source.
Advice. To convey the surrounding atmosphere, do not over-adjust.
Used as light sources. The set automatic white balance helped in this case to get these tones without applying additional settings.

Step 4: watch out for harsh shadows! The key is where your subject's face is pointing.
At night, the contrasts of light and shadow seem to be stronger. Pay close attention to lighting angles to avoid harsh shadows. If the light is coming from the side, such as in this photo, you can start by asking the model to look towards the light source. If the shadows are too harsh, change the angle of her head and, accordingly, the pose.
Ideas for night shots: playing with light and shadow
There are many other things you can photograph at night using the techniques outlined above. Look for interesting street scenes or. Things that you might not be able to capture in the daytime (such as ornamental lights) also make perfect subjects for night photography!
 Toucans Where does the toucan live on which continent
 Enlarging the image without losing quality
 Presentation of electroscope conductors and dielectrics electric field
 Discharge from the hospital Gifts and souvenirs upon discharge from the hospital
 Why Polaroid Sunglasses?
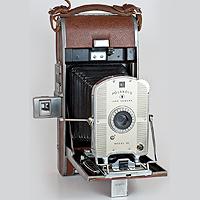 Polaroids - what are these glasses and what do they eat with
 Restoration of old and damaged photos Restoration of old photos in Photoshop