How to remove a plaster mold from a figure. Clay casting Plaster mold for clay
Slip casting is a technique for making pottery by casting into a mold, without using a potter's wheel or hand molding. It is used both in the mass production of clay, porcelain and other mixtures, and in the manufacture of small-scale and original items.
The mold, or mandrel, is made of plaster. After the slip is poured into the mandrel, it absorbs water. The clay settles and solidifies on the inner surface of the mold, repeating its relief in the smallest detail.
Slip composition
The base of the slip is clay with additives, diluted with water. Usually it is diluted to the consistency of sour cream or heavy cream.
Slip is prepared on the basis of one or several types of clay, adding sand, chamotte, electrolytes and dyes. For different types of products, the composition that is most suitable for them is chosen.
Slip casting technology
The slip casting process is based on two physical phenomena: the ability of gypsum to absorb water and the ability of clay to release water. It is possible to manufacture two classes of castings: thin-walled and thick-walled (solid). Against the background of potter's wheel technology or hand sculpting, the process looks quite complicated. Its application requires certain skills and experience. Even experienced craftsmen usually have to modify the molds. The entire technological process from the beginning of the development of the sketch to the receipt of the finished product can take up to several weeks.
Preliminary operations
First you need to develop a sketch. When developing, it is necessary to take into account the requirements of the selected technology, provide in the form of sprues of sufficient cross-section and in places that ensure the best filling of the mandrel and adherence to the model.
Based on the sketch, you can start making the model. The model is an exact copy of the future product, but differs from it in slightly larger dimensions. This is the allowance for the inevitable shrinkage during firing.
Models are made from materials such as plasticine, plaster, wood, ceramics, or silicone. Using the model, the master makes a collapsible mold from plaster. Other materials available in the workshop are not suitable for the mandrel, since only gypsum has the unique property of sucking water out of the slip. The form is parsed, the model is retrieved. The mandrel is being prepared for casting. The slip is diluted and thoroughly mixed immediately before casting.
The casting process itself consists of the following stages:
- Pouring slip into a mold
- Removing excess solution
- Drying of the casting
- Separation of the casting from the walls of the mold.
After drying, separate the parts of the mold and carefully remove the product. The casting is dried; if necessary, insufficiently worked out details are straightened.
Subsequently, the casting must be fired in a muffle furnace, as well as a product made on a potter's wheel or hand-molded. Slip-casting products can also be glazed. Glaze slip is applied to the surface. After that, the products are re-fired. The glaze components are baked to form a thin and smooth glassy layer.
Equipment and materials for casting
For casting, a slip of a certain consistency is used. It should be oily to the touch. The composition of the slip, in addition to clay and water, includes various additives that change the consistency and other properties of the suspension. Used as additives
- Other types of clay
- Sand
- Chamotte
- Electrolytes
- Dyes
The most important equipment is the casting molds. The quality of the final product directly depends on the thoughtfulness of the design and workmanship. In slip casting, gypsum molds are used. The mandrel is usually made in two parts. For exact alignment of the two parts, projections are provided on one of them, and in the other, corresponding to them along the profile of the depression. In artistic casting, characterized by small series, parts of the mold are held together with rubber bands. A plaster mold for slip casting has a limited service life, and when planning the production of large quantities (for example, tiles), it is necessary to provide for the production of several mandrels for each product.
Important! The mold must only be made of high quality sculptural plaster. Gypsum should be downy, free of foreign inclusions and lumps. The mandrels, made of high quality plaster, are capable of withstanding over a hundred castings. If the gypsum is of low quality, then after a dozen casts the walls begin to crumble and crumble.
Forms that have become unusable can be crushed with a hammer, sieved through a fine sieve and added to the gypsum solution for casting new mandrels in a ratio of no more than 1:10.
Major problems with slip casting
Thickening of the solution in the form
The solution can thicken simply by being in the mandrel. Therefore, before draining, it is better to activate the slip poured into the mold by gently shaking, rotating or shaking gently.
Sprue clogging
If a mold with a small sprue is used, the hole must be cleaned with a thin spatula before draining.
Some novice craftsmen carve the sprue crater without touching the hole and fearing damage to the casting. To keep the opening of the sprue free, you can insert cuttings of cocktail tubes into them.
The form must be turned over the container for draining and blow evenly and strongly into the tube. It is important to achieve full flow. Particular attention should be paid to the forms of complex relief.
After the slip is drained, the cut of the tube must be filled with water. In the same position, with the sprue down, the mandrel should be placed on the plastic surface.
Setting the form after draining the slip to its original position
After draining the solution, the mold must be installed in an inverted position. If you return it to the original one, slip streaks form along the walls of the product, and the thickness of the walls changes. Different wall thicknesses will lead to an increase in stresses during firing and even the formation of cracks along the sag. The casting can be hopelessly damaged.
Incomplete drainage of the slip from the mold
Incomplete draining can also lead to sagging and firing cracks. If a product of an intricate configuration is being drained, when draining, it is better to shake the mold at different angles, achieving complete drainage of the slip.
Features of thin-walled slip casting
If it is necessary to obtain a thin-walled product, it is important to remember that after pouring the gypsum will immediately begin to suck water out of the slip. Depending on the time the solution is in the mold, the thickness of the walls of the vessel or figure changes. Clay is deposited on the walls of the mold at a rate determined for each specific configuration and specific composition of the solution. Accordingly, the thickness of the shard also increases.
During the trial pouring, the slip is poured into the mandrel up to the top. Every 5 minutes, the thickness of the deposited layer is measured with a vernier caliper. Based on the measurement results, the master can calculate the time required to obtain a given wall thickness. Gypsum completely saturated with moisture ceases to absorb water, but in the case of thin-walled vessels, due to the relatively small volume of the shard, this should not be feared.
Slip casting application
Slip casting from clay is widely used both in industry and in artistic crafts.
Industrial production encompasses sanitary ceramics, figured furnishings, tiles and stove tiles.
The production of high-voltage insulators should be noted separately. Porcelain insulators combine an affordable price with excellent electrical performance, resistance to temperature changes and excellent durability. Their disadvantage is their high fragility. Recently, they began to yield their positions in the market to products made from modern plastics.
There are traditional techniques for working with clay. There are only six of them:
1) tape-harness - popular in the northwestern regions of Russia and Tajikistan;
2) East Siberian sculpting of vessels from several parts with joints running in a vertical direction;
3) Central Asian sculpting of vessels from four horizontal belts;
4) forming by knocking out;
5) kneading into a finished shape:
6) last but not least on the list is the drawing of a vessel from one piece of clay on a foot potter's wheel. There is, however, another method of making earthen vessels, but it can hardly be distinguished as a separate, seventh, method, since it was used to make only very uniform vessels for wine and grain in the Neolithic era.
In this way, the vessels were "erected" by hand, like building structures. A shape was sewn from coarse fabric, according to the outlines of the future vessel, which was filled with sand. Outside, the form filled with sand was coated with clay. As the vessel dried up, the sand was gradually poured out of the bag, and the vessel was burned in the fire. An imprint of the fabric — the former shell of the mold — sometimes remained on the inside of the vessel.
Separately, it should be said about the casting method, when the slip is poured into a plaster mold. Today it is the most common way of producing pottery, including majolica, earthenware and porcelain. It appeared in the Middle Ages and, due to its technological simplicity, quickly began to replace all other methods of making ceramics. But the ancient traditional methods of working with clay have not completely disappeared in our time. With their help, highly artistic ceramic works are created, revealing the wonderful properties of clay and at the same time serving a person. Therefore, we will tell you more about them.
To work with the first method, you need a turnsette (a round table made of metal, plastic or wood rotating on an axis) or a similar object replacing it. On a rotating surface, you need to stick a cake rolled out with a rolling pin. Having cut off the excess, leave an even clay circle on it and start winding the wall of the future vessel from clay bundles along its edge. This process is similar to the process of weaving a basket, but only without vertical rods, since ropes, unlike vines, stick together, and as the walls of the vessel grow, they are aligned with fingers or a stack.
The second method of making pottery is easier to describe, but more difficult to use. Having rolled out the clay, like dough, into a 4 mm thick flap, you need to carefully cut out the parts of the future vessel and prepare them for gluing. This process is very similar to patchwork. Clay flaps should be glued in a dried state (in a hard leather, as ceramists call it). On the surfaces to be glued (seams), it is necessary to apply a notch with a scalpel and lubricate it, as if with glue, with a slip. This method of working with clay has recently become widespread. Ceramists in the literal sense of the word "sew" all kinds of products from clay, from the simplest household items to complex sculptural compositions. By placing various textured fabrics on the table when rolling the clay, you can get clay patches already with the desired pattern. Now this method of clay "sewing" is called textile ceramics.
The third method of making clay products differs from the second only in the direction of the seams of the elements to be glued.
Fourth way working with clay, but it is the most difficult, and now I can hardly believe that in this way our ancestors made rather thin-walled vessels. (But it is also hard to believe that people, rubbing a wooden stick rested on a log in their palms, produced fire.) To make a vessel by knocking out, you take a piece of clay, press a rolling pin into it, but not through and through, but leaving a layer, which will serve as the bottom of the future vessel. Then put the rolling pin along with the clay horizontally and begin to expand the hole in the clay, as if rolling it from the inside.When the wall of the vessel begins to bend under its own weight, place the vessel on the bottom and hitting the rolling pin from the inside (while outside, substitute a specially rounded board or palm), bring the thickness of the vessel wall to the required one - 5-6 mm. Then stick the neck made in advance to the cylinder or pot obtained in this way. The bottle or crinkle is ready.
The fifth method - kneading into a ready-made form - is a repetition of pre-prepared forms with clay. The form is made from almost any material: wood, metal, plaster, it can be either integral or composite. When making solid molds, it must be borne in mind that the clay products crushed in them must be freely removed.
These methods of processing clay were used in the manufacture of various household items until an unknown genius, who can only be compared with the inventor of the wheel, created the potter's wheel. And only on it could the clay show everything that it is capable of.
At first, people worked for. hand potter's wheel, which greatly limited their capabilities, since they worked with one hand, the other rotated the circle. With the invention of the foot circle and the release of the second hand, man was able to finally liberate the clay.
The foot circle, which was used by the old Russian craftsmen, was made of wood (with the exception of a metal rod, which played the role of a bearing) and consisted of two discs: the upper one 40 cm in diameter and 5 cm thick and the lower one 60 cm in diameter and also 5 cm thick. The discs were reinforced horizontally, parallel to each other at a distance of 40-45 cm, with six or eight bars, placed either completely vertically or with a slight inclination to the central axis.
The central axis - a wooden round shaft 50 cm long - passed through the lower flywheel circle and was fixed with its lower end motionless (either by driving it into the ground through the floor of the workshop, or by attaching a "foot" to a thick board nailed tightly to the floor of the workshop). A metal pin was driven into the upper end on which, like on a bearing, wooden twists fastened to each other rotated. If the hole in the lower circle became too large for the shaft and the circle "dangled" - the shaft was wrapped in this place with hemp or flax brushes. During work, to make the circle easier to go, the shaft at the lower circle was wetted with water, and the upper metal rod was lubricated with vegetable oil.
The modern potter's wheel is equipped with an electric motor. How do you work on a potter's wheel? Of course, it is difficult to teach this in words. The main assistant here is, again, your future experience. But I will nevertheless draw your attention to the main points, I will just share my own experience, which indicates that the potter's wheel is a full-fledged co-author of the master, as it helps to feel the harmony of form.
To work on a potter's wheel, you need certain abilities, certain data. The first thing you need to start with, like learning to play the piano, is with the hands-on. Remember, if you don't place your hands correctly, you will never achieve good results. You will not be able to feel the thickness of the vessel wall, which means that it will either come out very thick and heavy, or you will make very thin walls before you finish making the vessel. And it just won't let you unscrew it to the end - it will collapse. There are three main hand positions when working on a potter's wheel.
The first, which potters use at the beginning of work, twisting the vessel in this position of the hands by about one third. In this position, the wall at the base of the future vessel is located between the middle finger of the left hand and the little finger of the right. The little finger is horizontal and the fingers of the left hand are vertical.
The second position is the main one, in which you give the vessel its final shape. The wall of the pulled vessel is between the index fingers, but twisted so that the index finger of the right hand is horizontal and above the thumb, and with your entire right palm you hug the vessel; the left index finger is vertical and forms a cross with the right one.
The third hand position is necessary for the potter mainly for the formation of the "lips" of the vessel. The walls of the vessel are located between the pads of the index fingers, while the index finger of the left hand is located below the thumb. When you achieve a certain skill, you may have your own peculiarities of hand placement, as, incidentally, they appear in violinists and pianists, but these characteristics should never distort the basic principle of correct hand placement. It is known that relearning is much more difficult than learning.
After placing your hands, you should master the basic operations. The first is centering the clay on the wheel. In this case, with the palm of your right hand, you need to learn to crumple the clay to the center, forming a cone. The right elbow can be supported by the thigh. Then, pressing on the cone with the palm of your left hand, lower it down to the shape of a washer and so on several times until the clay in the shape of a hemisphere rotates smoothly, without any beating, on a circle. The centering process not only mixes the clay and allows you to proceed to the next stage of work, but also allows you to get rid of the remaining small air bubbles that leave the clay with a bang when the cone is formed. When centering, you need to skillfully change the speed of rotation of the circle. With increasing hand pressure, the speed should increase. If you don't learn how to center the clay correctly, you will never truly master the art of pottery, as even a small beat of poorly centered clay at the beginning of the work will increase as the vessel grows and eventually will surely rip it off the circle.
An important point in the process of work is to fix the bottom of the vessel. This is where intuition should be connected, which can be helped. To get started, make regular vertical trapezoidal flower pots with a hole in the bottom to give you a feel for the thickness. The thickness of the bottom and walls of a pottery vessel should be 2-4 mm, depending on your skill, the quality of the clay, the size of the product and its purpose or character. But everything is in order.
In the center of a centered piece of clay, make a dimple with your finger, moisten it with water (when working on a potter's wheel, you must constantly wet your hands in a basin of water) and push the clay to an imaginary bottom. Then disperse the clay with radial forces to the size of the future bottom of the vessel and only after that start pulling the walls. Make the main effort with the hand that is outside, and with the other, mainly support the clay from the inside. This is, so to speak, the main point. When making various shapes, the hands are constantly, as it were, exchanging efforts. But by no means does any of them completely weaken. It is as if you are pulling the clay up and in, up and out, while the fingers of the right hand are slightly lower than the fingers of the left, between them the clay takes the shape of the letter "8". The vessel grows upward and outward under the influence of your hands.
Do not try to make a vase or krinka right away. Work through the individual operations first. And do not regret crushing the first awkward work. No need to produce freaks - this is the commandment of the ancient masters. And remember the most important thing: completely trust the clay, its internal memory, in no case contradict it, because clay keeps only harmonious forms. Don't forget about centrifugal forces, which, in general, form an earthen vessel. As the vessel grows, the speed of rotation of the circle, and hence the centrifugal force, must decrease, otherwise the vessel will simply collapse.
When finished, blot the vessel with a sponge, trim off excess clay at the base of the vessel with a chisel, let it stand for a while and wither. During this time, you can evaluate your work, and if your intuition tells you that the work was successful, take the string and cut the vessel from the circle. And when you truly master the skill of a potter, every time you pick up a freshly unscrewed vessel, you will be sincerely surprised at its extraordinary lightness in relation to its volume. It will seem to you much lighter than the piece of clay from which you twist it. And it is with this imaginary difference in weight that you can always measure your skill.
Next, you have to rush with the vessel, as if with a small child, because drying is a very crucial moment in the manufacture of pottery. By improperly drying the product, you will nullify all your previous efforts. Remember: a freshly unscrewed vessel is most afraid of drafts. Therefore, it is necessary to dry products in specially designated places. Products should dry slowly enough so that no tension arises inside the clay between the already dried and shrunken thinnest parts and still wet. That is why it is desirable, and by and large - so imperative, that the thickness of the walls of the product is the same everywhere, and this will depend on your skill.
The most complex products - glued, with spouts, handles and various moldings - must dry very slowly and preferably in special drying cabinets or just under plastic wrap. But you should not overdry the product either, since it will again absorb moisture from the air until it equilibrates with the ambient humidity. A characteristic and important moment in the process of drying any clay product is the moment when shrinkage stops. This moment comes when the evaporation mirror begins to gradually move into the depth of the product and its surface begins to brighten. From this point on, the drying speed can be increased. The amount of water remaining after shrinkage stops for plastic clays is about 10-20%, for kaolins - 25-30%. The technical name for this remaining part of the water is "pore water" (as opposed to "shrinkage water" removed during shrinkage). Residual moisture after drying is usually 6-8%.
The shrinkage during drying is the higher, the more dispersed and plastic the clay is. For example, Prosyanovsky kaolin has a linear drying shrinkage of -2-3%, loess - 3.5-5.5%, Gomel clay - 6.4%, Cambrian clay, on which the Pokrovskaya Keramika artel works, - 6.4 -6.6%, chaste-yarsk clays 8-10.5%. And one more thing: the behavior of clay depends on the duration of drying and the thickness of the walls of the vessels. Slow drying shrinks the clay slightly more than fast drying. The bulk of the clay and the strength of the items slightly decrease during rapid drying, and the thicker the walls of the vessels, the greater the shrinkage. The introduction of an electrolyte (liquid glass or office glue) into the clay or an increase in the amount of softener reduces shrinkage during drying. Be sure to use the experience of the Pechora potters in your work: so that the bottoms of small-diameter vessels do not crack during drying, for the first time they wrap the bottom of the vessel with a slightly damp cloth or newspaper. To prevent the bottom of a large-diameter dish from cracking during drying, wrap the edges of the dish with a damp cloth.
It must be said about polishing without fail. This is one of the old ways of decorating ceramic products. A shard in a leather-hard state is smoothed with a polish made of stone, bone, wood or metal. The surface of the shard is thus compacted and smoothed to a shine, which is retained even after firing. On the surface of a black-burnished vessel, partial burnishing creates lustrous patterns against a matte black background. We emphasize once again that the polishing is performed on an incompletely dried product. If this moment is missed and the product has dried, then it must be moistened before polishing. This can be done in several ways: by washing it with a damp sponge, sprinkling it with water from a spray bottle, or very quickly dipping it into water.
After the garment has dried properly, you should wash it. This term means an operation that requires special care, since you can break the product, because it is very fragile before firing. When washing with a damp sponge, you inhabit it, as if erasing dust, and at the same time all roughness, burrs, irregularities are washed out by water and disappear.
Items are ready for firing.
When writing this article, material was used from the Brockhaus and Efron Encyclopedic Dictionary (1890-1907)

This recipe for the separator is used by craftsmen from different countries. I studied with a Bulgarian ceramist, took a lesson from an old-school Russian modelmaster and rented a corner in a Czech ceramics workshop. All had the same recipe. For small forms, you can use both cream and petroleum jelly, you need to smear them with a thick layer. With large forms, everything is more complicated. Yes, and it is advisable to spread a thin layer to get thin seams.
Today's pre-made plaster of paris do not work well.
This popular separator is made with soap bar and diesel fuel. You need to take the cheapest soap, without fragrances, lotions and moisturizers. In Russia it is "Children's" and light "Economic". Dark "Household" will not work, it is alkaline.
The soap should be sliced on a grater, on the side with round holes with ragged edges. It is quite tedious, but if it is cut into large pieces, it will be difficult to dissolve it in diesel fuel without lumps. Pour the planed soap with a glass of diesel fuel and put it in a water bath, stir constantly. Important: do not use a gas stove for this, diesel vapors may ignite!
We add diesel fuel from time to time. Soap bars come in different sizes, and how much diesel you need is not known. We need to get a consistency thicker than toothpaste, but softer than shoe polish - roughly something in between. If, after long stirring in a water bath, a uniform consistency cannot be achieved, you can break up the lumps with a blender.
1 bar of soap will take about half a liter of diesel fuel. But take diesel fuel with a double supply. Firstly, more than 1/2 liter can go away, and secondly, the grease that has been stored for a long time begins to dry out from above, forming interfering crusts, because diesel fuel is very volatile.
I put some of the lubricant in a second jar and fill it with a layer of the remaining diesel fuel for storage.

The resulting separator is applied with a bristle brush in a thin layer - just smeared with a brush, as if painted. After a couple of minutes - the second layer.
The finished form must be rinsed without delay. We wash with a foam sponge with hot water and liquid soap. I like "Ariel-gel" in this application more than liquid dish soap. Do not rinse with hand soap, it contains emollient oils. Then rinse with running water and soak in warm soda solution. It is not necessary to make a too concentrated solution, it will be difficult to completely wash it out of the mold, and the mold will grow overgrown with soda "stalagmites". That, in principle, is not scary, they just need to be swept away with a brush.
You can do without soda, but once at a time you don't have to, and redoing all the molding work is a hell of a job. If the shard is poorly absorbed, then one of the reasons is the pores clogged with poorly washed off lubricant. This applies to any lubricant, and cream, and petroleum jelly. And if small forms can be properly washed without soda, then large ones cannot be washed so easily.
And at the same time I will tell you what is the most convenient way to cover the model.
If you are going to remove the life-size mold from the head of David, then you can't think of anything better than traditional clay. We can do without clay, it carries terrible dirt, even more than gypsum.
Regular modeling clay for artists contains wax, which is difficult to wash out. In addition, it is quite solid, it is difficult for them to cover large models.
The best cover, in my opinion, is Jovi's model plasticine for children in large packs. It is soft, it does not need to be warmed up, it evens out easily. And it does not contain wax, so it is easy and simple to wash off the molds. And one more plus of Jovi - it does not melt from the warming up plaster.

Clay casting
Page 19 of 25
Clay casting
Casting occupies a special place among the various methods of molding ceramic products. It makes it possible with great precision to make many exactly the same thin-walled vessels with a complex shape, small sculptures with fine details. Clay, or slip casting, is based on the property of gypsum to absorb moisture and on the property of clay to release moisture.
Slip is a clay, diluted to a state of fluidity, resembling thick cream in consistency.
The plaster mold into which the slip is poured intensively absorbs water. In this case, a layer of clay mass of the same thickness is evenly distributed over the inner surfaces of the mold, forming the walls of the future product, or, as ceramists say, a shard. After drying, the hollow clay product is removed from the mold and dried before being fired. This is, in general terms, the scheme of clay (slip) casting. Direct casting is preceded by a lot of preparatory work. It is necessary to complete a sketch and make a model of the future product based on it, and then cast a casting mold from plaster according to the model.
You should start developing a sketch only after you have a clear idea of the purpose of the product being developed, because the shape, proportions, size and decorative finish are in close connection with it. But keep in mind, no matter how successful the sketch is, when making a voluminous thing on it, it is almost always necessary to make some corrections. Thus, direct work on a volumetric model can prompt the artist to make decisions that cannot always be predicted in a sketch. In production, sometimes there is a division of labor, when the sketch is done by the artist, and the model is carved by the master modeler. In order for the creative process not to be interrupted, the artist must be able to grind or carve models himself.
The model can be made of wood or plaster. Models are sharpened from wood on a lathe or made with carpentry and carving tools.
The turned and cut parts are joined together using nails, screws and waterproof glue, such as BF-2 or epoxy resin. The finished model is impregnated with hot linseed oil several times and dried. Plaster models are turned on a special grinding machine, which is, in fact, a potter's wheel, on the right and left sides of which there are stepped supports (Fig. 33.1a).
During turning, a wooden lath-rule (33.1b) is laid on the steps. The straightener serves as a support for the cutter when turning the model. If you connect an electric motor to a potter's wheel, then it can be used as a grinder. Several rails are stuffed onto the upper disk and a formwork made of waterproof cardboard impregnated with linseed oil or paraffin (33.1c) is tied around the perimeter with twine. Gypsum (33.1g) is poured into the formwork. Thus, after the gypsum has hardened and the formwork has been removed, a massive cylindrical ingot is formed on the disk - the head of a grinding machine (33.1d). The head is positioned so that during operation the rotating model is approximately at the level of the grinder's eyes. Just as when pulling a piece of clay on a potter's wheel, the disc should rotate counterclockwise at a speed of 300-350 rpm. According to the principle of operation, the grinding machine resembles a lathe: chips are also gradually removed from the rotating workpiece with cutters until the desired configuration of the body of revolution is obtained. But unlike a lathe, the gypsum workpiece is positioned vertically, not horizontally.
Thanks to this, it is convenient to cast the workpiece directly on the head of the grinder; moreover, the master sees the product in its natural position, that is, just as if it were standing on the table. When searching or refining a form, this is very important. Cutters for a model-grinding machine are called clubs (33.2b). The golf clubs are made from steel rods that are placed on wooden handles. At the end of the rod, a steel plate is attached at a right angle, which has the shape of a triangle, rhombus, trapezoid, shaft, etc. Since the material being processed is soft enough, there is no need to harden the cutting parts of the cutters. Some cutters can be made from thick wire, the end of which is flattened and crocheted. Such sticks are used when turning earthenware on a potter's wheel.
When determining the dimensions of the model, and therefore the workpiece, it should be borne in mind that the clay casting after drying and then after firing is reduced by a total of 10-15%. In order for the ceramic product after drying and firing to have the dimensions previously planned in the sketch, the model should be made larger for its shape, taking into account the percentage of shrinkage, which is determined empirically. If it is known in advance, the dimensions of the plaster or wooden model are determined by the formula: X = 100 x a / 100 - b, where a is the size of the ceramic product after drying and firing, b is air and firing shrinkage in percent. Suppose the finished stoneware height is to be 250mm with 10% shrinkage of the clay mass. According to the formula, we determine that the height of the plaster model should be equal to 276 mm. If you are dealing with the same clay all the time, it means that the shrinkage will always be constant. In these cases, a scale compass made of two steel strips (33.2a) can be used to determine the size of the model. Bend the ends of the compass so that the distances between them have certain proportional ratios, which are established empirically. The compass solution on one side should correspond to the actual dimensions of the clay casting, on the other - to the size that you want to take on the model. Having prepared the machine and tools, install on the gypsum head a shell in the form of a cylinder rolled up from a dense cardboard or tar paper impregnated with linseed oil (33.3a). Bind the cylinder with soft wire or sew with thick threads.
The height of the shell should correspond to the height of the model being machined, and the diameter should correspond to the largest diameter of the model with a small allowance.
Pour gypsum mortar up to the top into the formwork fixed on the head of the sharpening machine (7 parts of gypsum with 10 parts of water). As soon as after 8-10 minutes the plaster has hardened, remove the formwork and, having marked all the main dimensions with a pencil (33.3b), proceed to grind the model. Put the rule on the upper steps, rest the putter on it and begin to remove the chips from the rotating gypsum workpiece (ЗЗ. Зв).

Moisture-saturated gypsum is very easy to cut. It should be kept wet until the end of turning. When dry, the gypsum must be moistened with a sponge soaked in water. Having achieved the desired configuration of the model, cut it off at the base with steel wire, and then dry it at room temperature for 2-3 days. The dried model is impregnated several times with linseed oil or epoxy resin diluted with acetone. It takes at least two more days for the model to dry out. The model serves as the basis for the manufacture of a casting plaster mold. The simplest plaster mold consists of two halves. Before you start casting the mold, make a shallow hemispherical cut on the side of the bottom at the base of the model. This will ensure the stability of the future casting. Install the tar paper formwork on a flat panel, having previously lubricated its inner surfaces with a release agent (Fig. 34).
Prepare a release agent from two parts of paraffin and five parts of kerosene, melted in a water bath. After finishing the preparation, pour a layer of gypsum with a thickness of 10-15 mm (34.1) into the formwork. As soon as the gypsum sets, but does not lose its plasticity - after about 1.5-2 minutes - install the model inside the formwork, pressing its base into the soft gypsum. Then add gypsum to the formwork so that the mortar is at the level of the most convex areas of the model.
Remember that if the level of the gypsum slurry is raised above the most prominent points, the model cannot be removed from the bottom of the mold.

After removing the formwork, cut out a rebate (quarter) along the entire perimeter with a knife, which will later be part of the lock connection of the two halves of the plaster casting mold (34.2). Lubricate the cut planes with a release agent and reinstall them in the formwork, which now needs to be filled with gypsum mortar to the top (34.3). After the gypsum has hardened, remove the formwork and on the lateral surface apply a line (34.3a) that runs along its axis and crosses both halves of the mold. This is necessary so that when assembling the mold, it is possible to quickly and accurately connect one half to the other. After applying the risks, the hardened halves of the mold are disconnected and the model (34.4) is removed from it. The form must be dried already without a model for two to three days. It dries much faster if it is dried near an oven or central heating radiator. The form is ready. Now you need to prepare a slip - elutriated liquid clay. The method of elutriation of clay is described at the very beginning of the book.
Clay casting... Pour the slip into a well-dried plaster mold to the top (fig. 35.1). The porous gypsum will immediately begin to absorb moisture from it. It is easy to guess about this by how quickly the slurry level will drop in the form. By sucking in moisture, gypsum attracts to the surface of the mold the smallest particles of clay that are suspended in the slip. Gradually, a fairly dense layer of clay mass forms on the walls of the mold.
The process of absorbing moisture with the simultaneous growth of a clay layer on the walls of the mold is called by ceramists "the sucking of a shard".
Immediately after pouring the slip, this process proceeds very quickly, then it slows down and stops altogether. It is at this moment that the slip must be drained (35.2). On the walls of the inner surfaces of the gypsum mold, a layer of clay remains in a pasty state - the walls of the future vessel. After a while, the clay layer on the walls of the mold begins to dry out (35.3). At the same time, it shrinks. In this case, the casting is reduced in size, and its walls (shard) are gradually separated from the plaster mold. At this point, the walls harden and become thinner. After making sure that the casting is dry enough, and its walls have separated from the mold, carefully remove the upper half and just as slowly remove the casting from the lower half of the mold (35.4).

While the product is not yet completely dry, they make its mandrel: cut off with a knife the prominently protruding seams formed here and there at the joints of the plaster mold; all kinds of dents, grooves and scratches are closed up with soft clay; after that, the surface is smoothed with a damp sponge. If the product is dry, then the irregularities can be eliminated with sandpaper. After the mandrel is set, the product is placed on a shelf and dried at room temperature for five to six days. After drying, the hygroscopicity (moisture absorption) of the gypsum mold is completely restored and the next ceramic product can be cast in it, which will be an exact copy of the first. About two hundred castings can be made in one mold. Of course, a vessel based on a body of revolution can be made in another way, for example, on a potter's wheel. But there are vessels for which casting is almost the only way of molding. These include the rectangular decorative vase shown in the figure (Fig. 36).
The vase model is made from a rectangular wooden block, to which legs and necks are glued, turned on a lathe (36.1). A relief is cut on one or two walls of the model. The finished model is cleaned with sandpaper and impregnated with hot drying oil two or three times. The mold according to this model is cast in the same sequence as a round vase, only instead of a cylindrical formwork, a rectangular one is used, assembled from four planks (36.2). The formwork and the pallet are lubricated with a separating mastic and liquid gypsum is poured into it so that exactly half of the model is in it. The locking connection is obtained by cutting out in the lower half of the mold at the corners of the conical grooves (36.3a), which are lubricated with mastic. After the second half of the mold (36.4) has been poured, the plaster of Paris fills in these recesses, forming spikes. When assembling the form, the pins will fit exactly into the corresponding recesses and ensure that both halves are joined accurately.
The finished mold is freed from the model, dried, and then cast in an already known manner (36.5).

Rough molding into plaster
Consider the process of "rough" molding into plaster. That is, the technology of creating the simplest plaster mold, followed by casting.
"Rough" is called molding from a model molded in a soft material in order to convert the model to plaster or another material convenient for subsequent finishing.
Unlike "finishing" molding, which is usually done from a finished model made of plaster or other hard material, with the aim of further translation into other materials, castings of the circulation (from several pieces or more), etc.
Simply put, the sculptor sculpted something in a soft material (clay or plasticine), but it is impossible to store or display the sculpture in this form - it is easy to wrinkle, and the clay also dries up. Therefore, it is necessary to transfer the sculpture to another material, one in which the sculpture can, firstly, be preserved, and secondly, if necessary, modify it.
The most traditional material for these purposes, since the time of Ancient Egypt, is gypsum.
Of course, you can immediately translate the sculpture into other, more durable materials, especially if there is practically nothing to bring, but the essence of the molding operations will not change from this.
The place where you have to mold can be covered with plastic wrap. It is advisable to cover the floor and surface of a sculptural machine, work table or just a stool on which you are going to mold with the same film. These beneficial actions will significantly reduce the scale of subsequent harvesting.
In the examples below, the portrait and half-figure will be molded "into two pieces", that is, the shape with each of these sculptures will consist of two parts, or, as they say, " pieces "or" shells ".
The front, most part, of the mold is obviously not removable, therefore at the very end of the process, in order to take out the finished casting, the mold must be carefully broken. Therefore, this molding and casting process is also referred to as "splitting".
First you need to decide where the boundaries of the two parts of the form will go.
The mold should be able to be disassembled, removed from the model, made in soft material. Therefore, one of the parts is most often made a little or noticeably smaller, so that when disassembling the form, it can be easily separated.
The remaining part should have a sufficiently large open part through which it will be possible to a) clean the mold of clay and b) visually make sure that there is no clay left in the mold and that the entire surface has been treated with a release agent.
So, placing a sculpture in a soft material in front of you, you need to determine where the boundaries of the parts will go, you can, if you wish, outline the contour with a sharp tool.
Then, along the planned trajectory, it is necessary to set the sides made of thin metal plates.

In this case, we are using plates cut from thin sheet copper for this. Whenever possible, making sure that the gaps between the plates are as small as possible.


If you wish, you can walk over the plates with adhesive tape and thus make the surface of the board ro v noah, no gaps.
Next, the next stage begins - the creation of the plaster mold itself. When forming into a split, the first layer of the mold is tinted. This is done in order to be more careful when you reach it when the mold is split - the casting will already be located behind it.
It is convenient to use some inexpensive dry pigment to tint the gypsum.
It is undesirable to use any paints, for example gouache, because the plaster of Paris may not set or gain strength.
To knead gypsum, including the first (colored) layer, we need a container, preferably with flexible walls, for example, a plastic bucket or a rubber ball. It is convenient to clean such a container later.

It is advisable to dilute the color pigment separately, in a small amount of water and mix thoroughly.
Cold water is taken to knead the gypsum. The ratio of water to gypsum by volume is 1.5-1.75 parts of gypsum per 1 part of water.
Water is poured into a container, then diluted pigment is added, then gypsum is poured.

The gypsum is given the opportunity to soak in water (1-2 minutes), then it is thoroughly mixed.
A variant of determining the proportion of gypsum between water - the gypsum is poured into the water until a small "island" appears. But in order to more clearly understand the proportion obtained in this case, it is better at the beginning to measure the volume with two glasses (one for water, the other for gypsum), while noticing how large the "island" is obtained with a greater or lesser proportion. After a while you will be able to knead "by eye".
Stirring with your hands also greatly contributes to the development of a feeling of density of the batch, while the absence of lumps can be controlled.


For mixing small volumes, it is convenient to use your hands or a special spatula, for large ones, it is a traditional whorl in the form of a cross, stuffed onto a long handle (picture below), or an ordinary modern metal whisk inserted into a drill, as is done on construction sites for mixing mortar. If you buy such a whorl, it is better to take a more rare option - twisted in the opposite direction, when rotating, the solution will not rise (as is more convenient for concrete), but, on the contrary, will go to the bottom - in this case, it is less likely that if you press carelessly on the button of the drill, you yourself and the entire surrounding space will be in plaster.


Before applying the plaster, the surface of the clay work must be sprayed with water from a spray gun. On a surface moistened with water, gypsum spreads better and fills in all irregularities. Applying gypsum to a surface that has not been wetted with water can cause the clay to absorb water from the gypsum being applied to it, and this leads to the formation of bubbles and voids on the surface of the mold. In addition, the gypsum, devoid of part of the water, becomes very porous, and this leads to the fact that the release agent is very strongly absorbed into the surface of the mold and the mold can be difficult to separate from the casting. At the same time, the water must have time to drain from the surface of the clay so that the gypsum does not liquefy because of it.
We let the gypsum thicken to the viscosity of kefir and spray the surface of the sculpture, trying to get the gypsum into all the grooves and cracks.

This stage is called "splash". Its task is to ensure that the gypsum confidently covers the entire surface, without leaving bubbles and empty spaces. To do this, in critical places, you can slightly blow on the surface of the gypsum, thus expelling possible bubbles.

If the entire surface is covered, wait a bit. Gradually, the gypsum we diluted thickens, and we apply a thicker layer over the "splash". Remember that the gypsum that begins to thicken cannot be stirred again, otherwise it will "rejuvenate", that is, it will not be able to grab.
It is important to try to ensure that the colored layer lays down more or less evenly, without too thick (more than 1 cm) and too thin (less than 3 mm) places. Too thick places make the idea of slicing it meaningless for easy splitting. Too thin places can break off the outer, white layer in the most critical places, severely damaging the future plaster cast.
It is advisable to quickly cover the entire surface with gypsum, preventing the formation of matte spots before a layer of at least 3 mm is collected. The dullness of gypsum at low thickness indicates that the clay has absorbed water from the gypsum. This can lead to the fact that with insufficiently good lubrication of the mold from the inside, this layer will not be easily separated from the casting.

In order for the splitting of the form to occur in layers (first the top one, then the colored one), the adhesion between the layers must be, but be weak.
For this purpose, it is advisable to walk the surface of the colored layer with liquid diluted (to the thickness of milk) clay. Due to this, adhesion to the next layer will be carried out mainly due to the unevenness of the surface.
Some masters, for example D. Broido, in his book "Guide to the plaster molding of artistic sculpture" ("Art", 1937) advise to coat with liquid diluted clay not the entire surface of the colored layer, but only the protruding and most important places, but the required, weak degree the adhesion of the colored and subsequent layers is achieved due to the correct work with the consistency of the gypsum - the next, non-colored layer of gypsum should be applied when it begins to thicken.
The edges, as you can see, we do not cover, they still have to be one with the next layer.

In the given example, there were no sides, that is, the form will consist of one piece. This can be done if you are sure that all the clay can be removed through the lower open part.
And here are some more examples of smearing the middle part of the colored layer with liquid clay, or only the protruding and most critical parts, as some authors advise.


For these purposes, it is convenient to dilute clay in a small glass to the state of milk or cream.

After waiting for the clay to dry, apply the next (not colored, just white gypsum) layer, it should be 2 to 5 cm thick depending on the size of the mold... Some authors advise to strengthen it with reinforcement (wire). Some people place the pieces of wire directly on the colored layer before applying the white. Someone is in the process of applying white. Personally, I am not sure that this should be done. On the other hand, when splitting a mold, pulling out parts of the reinforcement greatly simplifies and speeds up the process of splitting itself.
It is also advised to start applying a white layer when it begins to thicken, then the adhesion between the layers will just be quite weak and you can even do without smearing with clay. At the same time, of course, you need to keep pace until the plaster begins to set, remember that you cannot knead the setting plaster, otherwise it "rejuvenates" and cannot set.
It is important to check that the outer layer does not have unexpectedly too thin spots, especially on protruding parts such as the nose. In the process of further cleaning and washing of the mold, thin places can accidentally be pressed through and holes in the mold can form in these places.
It is also important not to allow voids between the colored and white layers, since this, when processing the form from the inside, can lead to shedding of the colored layer and, accordingly, damage to the casting.
To obtain a uniform second layer, first lay the gypsum around the perimeter, creating a kind of frame, uniform thickness, and then apply the gypsum not randomly, but moving from the edge and maintaining the thickness.
The proportion of gypsum to water in the white layer should not be stronger than in the first layer, but better - slightly weaker. A stronger second layer can crack when the gypsum sets.
After waiting for the layer to grab, turn the work with the back side towards us and carefully take out the plates. In this case, pull carefully, along the edge of the form, so that the gap from the plates does not expand.

If at the opening edge of the mold you can see differences in height from unevenly exposed plates and shells (empty spaces) - do not get upset, just a little later all these defects will need to be covered with clay in order to exclude the hooks of the back half of the mold on the front.
Then we remove the sides, cut half or slightly less than the opened edge of the plaster mold with a knife and cut out the holes for better fixing of the parts of the mold to each other. All this can be seen in the photograph.

Some craftsmen place the plates especially carefully and do not take them out during molding, and the edges of the plaster mold are made wider than the plates. In this case, semicircular indentations are made on the part of the form protruding beyond the edge of the plates.
Lubricate the edge of the plaster mold with liquid diluted clay , if necessary, we fill up the existing shells (voids) in the side of the mold with clay, if there are hooks from the height differences between the plates, we also fill them up and stick on clay "wedges" - we need them to open the shape.


Then we dilute the tinted gypsum, let it thicken to the state of kefir and make a splash, after the gypsum thickens a little more, finish the colored layer, let it grab, coat the protruding parts with liquid clay, let it dry, apply a white layer, thickness from 2 to 4 cm.

Since clay work tends to dry, all molding should be done within 2-3 hours. In reality, everything happens faster, but if the shape is large and complex, the task should be set as soon as possible to cover the surface of the clay with gypsum, at least a colored layer and a little white, and then gain a sufficient thickness of the white layer. In my practice, there was a case when two novice molders for some reason molded a multi-part mold from clay work for more than one day, and they forgot about the need to constantly maintain the moisture of the clay. Accordingly, the mold was being made, and the work gradually dried up ... When the future molding masters disassembled the mold and made a trial casting, they themselves and all their colleagues were quite surprised :)
After half an hour or later, you can begin to open the form. To do this, we prepare wooden wedges and carefully start hammering them into places where clay "wedges" stick out at the joints of the mold. If, when applying the plaster from the back side, part of the plaster fell on the front side and the joint between the front and back sides became invisible and the shape may not open due to sagging, all these incrustations can be cut off with a knife (wet gypsum is easily cut), or in molds larger - with a small hatchet. When cutting off leaks, the joint line becomes visible due to the fact that the edges of the front side mold were painted over with liquid clay. Also, this advice is relevant if, for some reason, the clay "wedges" were not made and the wooden wedges are to be driven directly into the joint of the two parts of the mold - then this joint should of course be visible.

We hammer in a little and everything in parallel, then pour water on the pegs, wait for them to swell and begin to open the form. At the same time, you should not act too hasty - too fast an effort can lead to the fact that the form will crack.
If this suddenly happens, do not despair, it is simply advisable to notice it in time and if only part of the form begins to recede, try to return it to its place, so that the edges of the crack join together as much as possible. After that, you need to dilute the gypsum, moisten the cracked place with water and apply a bun 1-2 cm thick and 5-7 cm wide to the sides of the crack. At the same time, you can lay a piece of plastic or metal mesh in the plaster as reinforcement. Then you need to wait until the gypsum sets (heats up and begins to cool) and continue opening the mold slowly and carefully, trying not to subject the cracked area to stress.

When a gap is formed, carefully, without sudden movements, we separate the parts of the form, if necessary, helping ourselves with a chisel or a spatula.


If, despite all attempts, the form still does not open, there is no need to try to open it with the help of rough and abrupt actions - it is so easy to damage it. It is better to check again the conformity of the shape of the pegs (maybe they are too narrow and just make a move for themselves, instead of gently pushing the halves of the form apart), water again, carefully and evenly hammer all the pegs from all sides.
Also in a similar situation, you can dismantle the base of the frame and open yourself access to the lower, open part of the form. Next, turning the mold upside down with the open side, gradually pouring water, soak and begin to remove the clay. It could have happened that there are irregularities on the surface of the back of the work, even minimal hooks, and the clay has become too dense (due to insufficient watering during the creation of the work) and cannot come off. If the neck of the mold is wide, you can remove a significant part of the clay before opening the mold, and this should be done. If the neck is narrow, pouring water into it will gradually soften the clay. After a while, you need to try to open the form again.
If in the process of opening the mold, the necessary pieces nevertheless come off from it, you need to assemble them and mount them back either by carefully connecting and sticking a plaster of paris from the outside, or after cleaning the drying of the mold, glue it onto a second glue.
Then you need to clean the mold from clay / plasticine. We do this with a loop-stack, a wooden stack and rinse the mold with water and a brush.

If you need to remove a lot of clay or plasticine, then it is convenient to do this with a loop-stack, provided that it is strong enough. In this case, you must act carefully so as not to cut off the parts of the form protruding into the inside.

When the bulk has been removed, it is better to move to a wooden stack.
If it so happens that the clay has become very dense and is difficult to remove (as a rule, due to the fact that the work was carried out for a long time and was rarely watered), you can soften it by soaking it in a bath. At the same time, it is advisable to check that the clay and pieces of gypsum do not clog the drain.

In a similar case with plasticine (if it is difficult to remove due to its hardness), you can warm it up with a fan heater.
When removing the plasticine, prying from the sides, you can take out almost all the work at once. When removing the frame, pull carefully so that the wire of the frame does not hook or damage the shape.

When the mold is cleared of clay, it must be completely washed by gently wiping the roughness and grooves with a brush. Alternatively, you can do this in the bath, remembering to avoid blocking the drain.
The task of touching with a brush when washing the mold is to pry off the clay so that the stream of water can remove it, and not subject the mold to friction. Excessive friction can easily distort the shape.

If further work on the same day cannot take place and the form has to be stored for some time, it is recommended to assemble it and tie it tightly with rope or tape. If this is not done, parts of the mold, being damp and stored separately, may bend slightly (raw gypsum parts may bend under the influence of gravity), each in its own direction, and later, when assembling the mold, cracks may be found.
One of the traditional versions of the release agent:
The surface of the mold is covered with liquid soap several times until the soap is no longer absorbed. Then thin a layer covered with vegetable oil or petroleum jelly.
The basic principle when lubricating a mold with any composition is that the entire surface, without exception, should be smeared with as thin a layer as possible. A thick layer of grease, especially if it settles in the depressions of the mold, can severely ruin the casting.
In the old days, for these purposes, the inner surface of the mold was sprayed with "liquor" (a strong decoction of birch ash), as it gave the thinnest separating film. To ensure that the molds lagged behind the casting in this case, the mold was saturated with excess water. New gypsum no longer adheres to an over-wetted gypsum surface. Cases are also described when an excess of a wetted mold lagged behind the casting without any lubrication. Naturally, in your first molding experiments, it is better not to risk it. But experimenting with adhesion of gypsum to surfaces of different humidity and wetting the mold well with water is certainly useful.
Modern release agents in aerosol can deserve attention - spraying the surface of a form, especially a complex one, with an aerosol much faster than carefully smearing it with a brush. It is fundamentally important that before using any of these compositions on the surface of the mold, it is imperative to conduct an experiment on any piece of gypsum.


Parts of the mold are connected, tied with a rope, if there are cracks at the joints, they are laid with clay. Or you can simply fasten them with plaster, putting it on the outside at the joints, 5-8 cm wide.


Then the mold is turned over, set firmly and filled with plaster.
After kneading the gypsum, foam is removed from its surface with a spatula. Gypsum is poured into the mold with a thin stream along the edge of the mold - this also reduces the number of bubbles on the casting.
If you need to get a hollow casting, the gypsum is poured about a third of the volume and the mold is placed almost on its side and rotated so that the gypsum gradually settles on the walls, then the gypsum is poured back into the mixing container. Then, not all of the mold is poured again, and the process is repeated until the gypsum begins to thicken. The remainder of the plaster is smeared along the edges of the hole and these edges are leveled with a spatula along the edge of the mold.
If in one batch it is not possible to gain the required thickness, the second, and sometimes the third portion of gypsum is kneaded. The solution in these cases is mixed with a weaker one than for the first (outer) layer, otherwise ruptures of the casting are possible.
15 minutes after pouring or later, you can start splitting. This must be done carefully, using a chisel or chisel and mallet or hammer. The blows must be directed not inside the mold, but tangentially, so that the form is destroyed, and no effort is transmitted to the casting. The tool should not be too sharp, as its purpose is to split, not cut.
If possible, you must first remove the upper (white) layer of gypsum, and remove the tinted one more carefully. However, in practice, plaster can often be removed in some places immediately, exposing the casting. In this case, it is advisable to still try to remove the upper white layer in other places first.

Since the splitting takes some time, the person doing it gets tired and may lose caution, he may be tempted to hit harder and more often in order to quickly complete the process. At this moment, the person loses caution and hits the sculpture through the form - either makes a notch on the sculpture, or cleaves part of the sculpture together with the form.
It is good if the colored layer was applied in a more or less uniform thickness. Then you can quickly adapt to hitting the required force and not touch the casting. Of course, this will work if you have the patience to remove the entire white layer first when splitting.
It is advised to start splitting the colored layer from some convex and smooth part of the sculpture.
When, in the process of splitting, you approach the surface of the sculpture, you should slow down and remember that even if the work is completed half an hour later, nothing terrible will happen. And in any case, the restoration of the "hacked" surface of the sculpture may take much more time.
When splitting very small things, the outer layer is gradually cut into squares and carefully chopped off with a knife. Do the same with the colored layer, increasing caution.
If the sculptor does not mold and splits himself, but has turned to professionals, "shapers" for help, this is good on the one hand, because a good shaper will carry out the whole process of molding and casting much better, although he will take a lot for his services, but you need to make sure that the same shaper, if he already chops the shape, in no case tries to mask (putty with plaster or, as they say, "flip" ) on their own, because what will be "normal" and "smooth" in the eyes of a non-sculptor may mean a complete loss of form in this area for a sculptor.
You need to work especially carefully and without haste, approaching small details, because if something is accidentally beaten off and flies away into a mass of fragments of the form, you may never find this part and will have to re-fit it.
In this regard, we can cite the following case ...
In one of the sculptural factories located in Moscow, the sculptor asked one shaper to mold and cast a small figurine of a seated Pushkin. The shaper successfully carried out the work, but when the time came to shake the form, he was already somewhat "under the shafe" (which is generally characteristic of shapers and other workers of our vast Motherland). And Pushkin had a top hat on his head. And the formator accidentally knocked it off and did not notice where it flew off (the sculpture, I remind you, was small). I searched, looked for it among the fragments, did not find it. As a result, without hesitation, the resourceful formator took some plaster of Paris and created a haircut on Pushkin's head as best he could.
The sculptor came to take the work, did not notice anything, paid and took Pushkin away.
After a while he comes running and asks:
- "Where's the top hat?"
What a cylinder, says the formator, there was no cylinder!
- Why, it wasn't when I was! Where did you put the top hat?
There was no cylinder. When you brought the sculpture to me, there was no top hat on it. I shaped everything as it was.
Why don't I remember my job, or what? I suppose you lost it during the splitting!
No, there was no cylinder, there was not, there was, there was not! - the formator never confessed.


The seams can be cut with a knife immediately, while the casting is damp, or later, moistened with water.
On the In a mold-free casting, as a rule, bubbles are present in small (and sometimes in large) quantities, and sometimes there may be casting defects (not spilled places). It is convenient to use gypsum to seal large (from 4 mm) defects. Gypsum for these purposes is diluted very liquid (1: 1, or so), and the place of embedding is highly moistened with water. If you try to fill up the missing spaces with plaster of ordinary consistency, or it is not enough to moisten the casting itself with water, then the bulk of the casting will instantly draw water out of the newly applied gypsum, which in turn will become very hard, inconvenient for processing, and if more force is applied, it will be easily chipped off in a whole piece. Having applied a weak gypsum to the moistened place, it is best, as soon as it begins to thicken, to give it the desired shape.
For smaller holes, it is more convenient to use a putty, for example Maxi , or other "finishing" construction putty.
The same recommendations can be attributed not only to the sealing of casting defects, but also to cases of further refinement of the casting already in plaster. If you need to cut something off with a knife, and the casting has already dried and become solid, then the right place can be moistened with water using a brush. And in this regard, one interesting factor that sometimes lies in wait for a novice sculptor should be voiced - this is the desire to receive a cast from plaster, iron and polish it all. Despite the fact that the same places, while the work was in clay, did not cause concern at all with their "roughness", but looked quite natural. But something happens in the cast, the perception changes, and at this moment you can literally spoil the work by starting to smooth and smooth everything, which is why the sharpness and liveliness of the form and surface can be lost. In the future, if the work is translated, for example, in bronze or simply tinted in any shade, the perception changes in the opposite direction - irregularities and roughness cease to irritate, and again begin to be perceived as natural manifestations of the sculpting process, which it is absolutely not necessary to somehow hide, achieving a smooth surface. Therefore, a novice sculptor can be advised not to rush to iron his work, but instead, try to tone it, for a start, you can roughly and approximately, and thus understand how it will really look.
The finished casting can, if desired, be toned in any scale.
If the work is valuable and successful for you, you need to take care of it, using it as models. And for further sale, gifts, etc. use gypsum removed from it, or transferred to another material copies.
Oleg Toropygin

P.S. And those who are really interested in the technology of molding into plaster can be recommended to get or find in electronic form this book - D. Broido's "Guide to the plaster molding of artistic sculpture", published by the publishing house "Art" already in 1937 ...
The article is aimed at novice sculptors and molders, if you have something to add, you can send your valuable thoughts to the address -This email address is being protected from spambots. You need JavaScript enabled to view it.
 How many kilometers is the Moscow Ring Road in a circle?
 Where did the Moscow sparrows disappear: the conclusion of ornithologists Why did the sparrows disappear?
 How to make money on homemade toys?
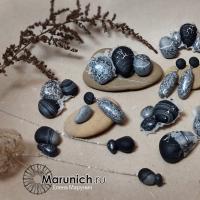 Coloring polymer clay in different ways
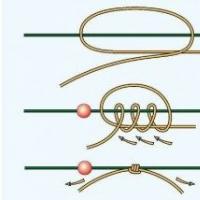 Self-tightening knot: types, methods of knitting
 How to find clients for a beginner interior designer Where to find orders for design
 International children's creative competition "Colorful colors of autumn. Important organizational points