Staple documents correctly: 7 basic steps
How to stitch documents with thread?
The problem of firmware is primarily of interest to the employee in whose job description this duty is prescribed. Most often, the burden of this "craft" falls on the fragile shoulders of personnel officers and accountants. It is very important to hone your skills: incorrectly made firmware can itself be a source of various problems if any important sheet from the documentation disappears.
So, how to properly stitch documents with a thread (step by step) and what is it for?
Basically, in office work, personnel and accounting documents are flashed, which are supposed to be stored for more than ten years. Since July 2013, constituent documents and applications to the Federal Tax Service have been allowed to be submitted for registration and not stitched.

How to properly stitch documents with a thread: photo step by step
Step 1. Equipment
- Make sure that the resulting stack does not exceed 250 sheets, and its thickness is less than four centimeters.
- Add a blank sheet to the block for an accompanying inscription. At the beginning, you can additionally attach sheets for an internal inventory.
- Archival book parameters - maximum 32 x 23 cm.
Step 2. Numbering
Use a special numerator or a black pencil. Insert page numbers. Their place is in the upper right corner of the front side. Numbers should not overlap with the main text. The description is not counted as a page when numbered.
If there is a sheet in the bundle that is not included in the format, it can be hemmed at one edge and folded, and numbered as one sheet. But if the folded sheet is hemmed in the middle, it must be counted as two sheets. The illustrations are numbered on the reverse side of the sheet.
Step 6 Firmware
Documents with a long shelf life can be stitched through, along with a cardboard cover. However, the generally accepted procedure is to start binding from the sheet following the binding.
Lay a cardboard strip on the first sheet. This will prevent the thread from fraying quickly.
Documents are stitched twice.
With three punctures: start stitching the paper from the back, from the middle puncture, leaving about 7 cm of thread. 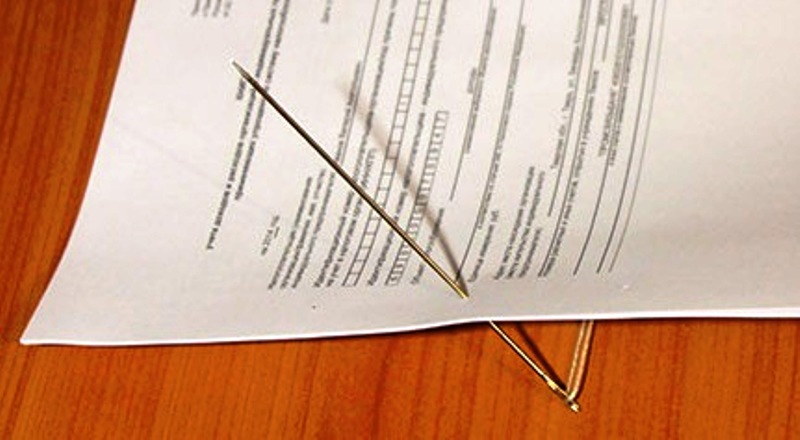
From the front side, insert the thread into the upper hole.

The needle was behind; send it to the bottom puncture.


Also leave at least seven centimeters of thread. Connect this remainder of the thread with the previous remainder and tie a knot.
Four holes: start stitching from the second puncture from the top. Then insert the needle into the top hole and then back into the second hole from the top.
Then the needle should fall into the third hole and, further, from the back - into the fourth. Finally, insert the needle into the third puncture from the front.
After tying the knot, 5-6 cm of free thread should remain.
Step 7. Sealing and Certification
Glue a piece of tissue paper so that both the knot and some of the hanging threads are covered. Thick paper for these purposes can not be used: the knot should be clearly visible.
 Ready-made business plan with calculations using the example of a web studio
 Registration of an internal memorandum: sample document and drafting rules
 Break even. Formula. Example of model calculation in Excel. Advantages and disadvantages
 Advance report is ... Advance report: sample filling
 How to stitch documents with threads by hand?
 Disciplinary sanction for non-fulfillment of official duties
 Binding your book