Drawing on the fabric at home. How to make a print on clothes with your own hands? Methods for applying acrylic paints
You will need
- inkjet printer, specialty tissue paper, large newspaper sheet to protect the work surface, fabric paints, palette, painting sponge or brushes, sturdy cardboard, stencil, hoop.
Instructions
Before applying the pattern, the fabric (clothes) must be washed and ironed with an iron so that the paints are well absorbed and the sticker adheres well.
In order to apply using thermal printing, find a suitable image or create it yourself using the graphic editors Adobe Photoshop or Corel Draw. Use the Preview feature to get a better understanding of how the drawing will look. Print the image on an inkjet printer on a special film - TTS for white or OBM for dark and color.
Carefully trim off any excess around the pattern with scissors. Remove excess thermal film with a needle. Apply the design with thermal film to the fabric, cover with gauze or a thin cloth and iron with an iron for about 15 seconds. Remove the film.

To place the image on the fabric, lay it on a work surface so as not to stain it with paints. Unfold the fabric. If it's clothing, place heavy cardboard inside to prevent paint from seeping and staining the other side. Secure the product to the work surface with tape.
Place a stencil on the fabric, secure it with safety pins or tape. Carefully study the instructions that come with the paints. Use a palette if required. Draw paint on a sponge or brush and carefully trace the contours of the stencil. If you have spray paints in cans, it is better to protect the fabric around the stencil with a newspaper. After applying the pattern, carefully remove the stencil. Do not remove the cardboard until the paint is completely dry. You may be using paints that are cured with a hot iron - in this case, follow the instructions.

There is a way to apply a pattern to fabric using a hoop. Transfer the design to the fabric using white transfer paper or felt-tip pens. Hoop the fabric and paint it with white paint around the design to create a solid base. When the backing is dry, color in the drawing - first dark shades, then light shades. After a day, after complete drying, iron the fabric from the wrong side with an iron to secure the pattern.

The fashion for creative pictures and catchy inscriptions on T-shirts never goes away. It transforms, popularizes: either cartoon characters, or comic book characters, or life-affirming phrases, or quotes from famous people, but the essence remains the same - something unusual that attracts attention to clothes. Do-it-yourself drawings on T-shirts will be a great alternative to the multiplied version of the print on things from the mass market. This is an opportunity to choose a base of any quality and color, and to express your individuality. A T-shirt that is painted with your own hand can become business card owner or a great gift for a significant event.
How to make a print with acrylic paints?
A long-lasting design at home can be applied using the method of cold or hot batik, felt-tip pens on fabric, aerosol cans, using a decal, but acrylic is the most reliable and popular. There are several ways to apply a print with acrylic paints:
- Copying a drawing from paper. This method does not require any special artistic talent, only accuracy. The drawing can be done by hand or printed on a printer. All outlines should be in a dark color that can be seen through the fabric of the T-shirt. For convenience, it is better to glue the finished drawing on thick cardboard, evenly pull a T-shirt over it and fix it with pins around the edges. Next, you need to carefully trace the contours using a simple pencil or felt-tip pens on the fabric, and start filling with color;


- Freehand drawing on fabric... This is a technique for self-confident, which gives more room for imagination. You can pre-draw the outlines, or you can immediately start working with paints, creating a work of art on your T-shirt. The method is more suitable for light materials, and those cases where some carelessness in the drawing is acceptable;

- Stencil application. The easiest way to guarantee good results. Drawing on a stencil is convenient because the picture can be copied many times on T-shirts, for example, for the whole family, the school KVN team, uniforms for competitions, or just a group of like-minded people who wants to be recognized in the crowd. To make the picture look more interesting, you can overlay stencils of different sizes, change the angle of inclination and colors;


- Screen printing. Designed for complex patterns of several colors. It is applied using special screen printing ink and mesh, roller and other tools. This method is not suitable for beginners.


Stencil painting
Of all these methods, stencil painting is the most common. It is simple to implement, economical in time and satisfactory in terms of results.
To complete the painting, you will need: a cotton T-shirt, a stencil or cardboard for it, acrylic paints, a small paint roller, a tray for diluting paints, gloves, scissors or a stationery knife, masking tape, an iron.

The procedure is performed step by step:
- Washing... Many people want to skip this point, but it is necessary to complete it. Acrylic paints are best applied to cotton items, and cotton tends to "shrink" when washed. The drawing will not shrink with the size of the T-shirt, it will deform, and the work will be spoiled along with the T-shirt and the gift of translated materials.


After washing, the T-shirt must be well dried and ironed with an iron so that the basis for the pattern is as even as possible;

- Stencil blank... While the shirt is drying, there is time to apply the design to thin cardboard. You need to cut out the contours very carefully, without chipping, otherwise the edge of the pattern on the fabric will turn out to be uneven. For the first try, you can buy a stencil in a store or glue a printout from the Internet on cardboard;


- Preparation of the work surface. A flat, hard surface, such as a desk or coffee table, is suitable for drawing. All the necessary tools are placed side by side, on the side of the working hand. Acrylic is difficult to wash off, so it is better to cover the table with old newspapers, and start the creative process in old clothes;

- T-shirt preparation... A clean, ironed item must be placed on the work surface, straightened so that there are no folds and irregularities. It is recommended to put a thick layer of paper or cardboard inside so that the acrylic does not get printed on both sides of the T-shirt, unless the idea implies this. Next, a stencil is applied to the T-shirt. To keep it in place during painting, the edges must be glued with paper tape;


- Dilution of paints... To prevent acrylic from starting to dry out ahead of time, pour the desired color into the tray or mix it from several different ones immediately before applying. In order for the paint to lay evenly, the roller must be evenly impregnated with acrylic. To do this, it is dipped several times in a tray until it becomes a little heavier, and then a test smear is made on a sheet of paper. If the layer is dense, you can start painting;

- Drawing a picture. With firm movements horizontally and vertically, roll up the stencil with a roller. You can go over the edges of the picture, but not over the edges of the paper; it will not be superfluous to apply a second coat of paint. When it dries a little, you can remove the stencil and leave the drawing to dry completely;


- Thermal impact... The paint will fix better if you iron a fresh print with a hot iron through a thin cotton towel. The T-shirt can then be worn and washed. The first few times it is recommended to do this in cold water on your hands, and the next - in a typewriter with the rest of the things.


How do I create an abstraction?
A boring old T-shirt can be revived with an unusual space print. You don't need to draw stencils of planets for this, all you need is a T-shirt, acrylic, gloves, bleach in a spray bottle and a few brushes.


If the T-shirt is new, it must first be washed and dried. The old one should be clean and ironed. It is better to apply abstraction on fabrics of bright or dark colors; it will not look so impressive on white and light colors.

The drawing process begins with the preparation of the work surface, in this case the floor. It is worth being located away from the walls so as not to splatter them with paint, and carefully cover the creative zone with newspapers. Then you can start working materials.
First of all, you need to dilute a small amount of bleach with water in a container with a spray bottle, prepare brushes and paint bottles of your preferred colors.

From arm's length, apply a bleaching solution to the T-shirt, wait for it to change color and dry. Then, having opened the paints, alternately dipping a brush in different colors, spray the T-shirt with them. It is more convenient to work on very small details with a toothbrush, spraying a small layer of paint directly over the fabric.
If desired, you can repeat the procedure with the second side of the product after the print on the front side is completely dry.


Drawing in nodular technique
The knot technique is essentially a type of batik. The main difference from traditional painting on fabric is that, as a reserve (a substance that separates one colored fragment from another, preventing the paints from mixing), not a special adhesive solution is used, but threads, strings and cords.


With the help of threads, knots of different sizes are fixed on the fabric, which are lowered into the paint. As a result, the paint fills only the fragment that is separated by threads, and diverges in beautiful "rays" along the creases on the fabric.

Making the knots is easy enough. There are no patterns or special rules, the fabric can be folded and bandaged as you like. The main thing is to decide how large or small the colored fragments will be, and carefully separate one from the other with the help of threads or a string.


It is better to take white threads so that they do not fade during dyeing. Of course, this can give an additional element of decor, but it can also ruin the whole idea.


In addition to threads, buttons and pebbles are often used to fill one or another piece of fabric to make the paint more interesting.

Nodular staining is performed in stages.
Training
The first step is to select the fabric and its preliminary preparation... Batik is applied to cotton, silk or woolen items; color is preferred white. Depending on your idea, you can spray, strip, stain, or print your shirt before tying the knots.

Forming knots
The second stage is the most important. It depends on how the drawing will end up. After twisting the fabric in a certain way and tying knots, you can get circles, flowers, stripes, or you can make them arbitrarily, and then the pattern will be unpredictable and original.


Filling nodes with color
The third stage involves choosing a staining method. The most reliable is to alternately lower the knots in a container of boiling colored water. This method guarantees the penetration of paint into all layers of the fabric and gives the effect of flowing from one color to another.


The fastest is using spray paint. For a lasting effect, it is enough just to spray it on the texture of the fabric for a few seconds, but there is a risk that the knot will not be completely painted over.

The longest and most costly method in terms of materials, but also the most beautiful as a result, is the use of pure paint. If you want smooth and soft transitions, the knot needs to be moistened before dipping it in the paint. If the priority is a bright, rich ornament, the fabric of the T-shirt can be left dry. So, to dye a T-shirt with clean paint, first of all, decide on the colors of your future T-shirt, put them in molds and dilute with a little warm water.

It is important to respect the proportions of paint and water. If the ratio of paint is higher, then the color of the picture on the T-shirt will be more saturated. But at the same time, it is not necessary to make the solution very thick, otherwise it will lead to coarsening of the tissue. The solution should also not be too watery, as this will lead to color loss when the shirt dries.

Then we proceed directly to coloring the T-shirt. We take a syringe, pour the solution into it and begin to squeeze the solution onto the T-shirt.


The more knots and colors involved, the more interesting the print will be.

Fixing paint
When the product is dry, you need to iron it with an iron through a thin fabric without a pattern, so the paint will fix better and last longer.

The fifth stage is final... It is optional, but nevertheless, you shouldn't skip it. The knotted technique requires the use of a large amount of paint, which may start to wash out during the first wash. To prevent this from happening, a day after fixing the paint, the T-shirt must be moistened and rinsed in running water, washing out the excess amount of acrylic. After that, the product is ready to be worn and washed along with other things.

Master class on painting at home
Drawing a picture on things with your own hands is a time consuming process, but not difficult. The classic version on a white T-shirt is carried out as follows: drawing a pattern according to a template, creating a contour, filling with color, fixing the paint with an iron.

How to make drawings on clothes without thermal paper? You can buy expensive felt-tip pens for painting on fabric, but you can get by with cheaper means.
Let's say you want to make a drawing with ordinary permanent markers or wax pencils. But how to fix the pattern on the fabric so that it does not blur after washing? I tried a variety of adhesives, sealants, acrylic varnishes for this and the result was this master class.
So, one day I decided to draw a finch.
First of all, I transferred to the eye a sketch of a bird with a red thin permanent marker.

Then I had to circle the drawing with a black thin marker, since the red color turned out to be too faded - this was the calculation: you can correct the drawbacks of the drawing, if anything.
Then I put a newspaper inside the shirt and painted the body of the bird with wax crayons, and then went over it with thick felt-tip pens.
This was done in order for the oil-based wax pencils to play their water-repellent role and prevent the markers from spreading over the fabric.
Also, permanent markers, unlike felt-tip pens, spread less and give a color transition from one to another - as can be seen on the feathers of the wings - in contrast to acrylic paints.

Now it's time to fix our drawing!

The photo shows what kind of sealant was used - transparent silicone, no additives, brand "Novbytkhim", was bought in a construction goods store. The sealant is applied exclusively with your fingers and spreads evenly over the pattern, and a little behind the pattern for secure fixation. Then you need to wait half an hour to dry and walk with a hot iron to make the surface smoother. It is better to put the newspaper inside the shirt so that the silicone does not crack from the temperature. And voila!
Reading time: 7 minutes
Russian sarafan, Indian sari, Japanese kimono. Each of these works of art is united by a mysterious, distant, subtle artistic craft - painting on fabric fibers. Different eras, countries offered their own vision of drawing on fabrics. Batik, kalamkari, mehendi - techniques for drawing a picture on a canvas, creating artistic masterpieces on it ..
 Since ancient times, people have been worried about the question: how to make a drawing on fabric? For the first time, the technique of hand painting on textiles appeared many years ago on the territory of mighty and perfect Indonesia. Batik is an ancient art, it was worshiped then and is appreciated today. Modernity associates and invests in this concept several meanings: both the technology of hand painting on fabric, and one of the types of classic Indonesian paintings.
In its development, batik technology has undergone many transformations, it is being improved and complicated even today in different parts of the world, but in the minds of most connoisseurs of luxury textiles, the fact remains that batik is associated precisely with the islands of Indonesia. The manufacturability of the process significantly differs from the original recipes. Two substances remain unchanged - wax and water.
Batik - A drop of wax
Batik ... Why was this name given to the art of painting on fabric? You should turn to the translation, which reveals all the secrets of the magic word. "A drop of wax" is an exact translation of the word from the Indonesian language, which describes the essence of the process of the ancient craft.


The wax applied to the fabric blocks the channels of the applied paint (does not let them pass through itself). It is due to this property of molten and hot paraffin that certain areas are uncolored on the canvases obtained after dyeing the textile canvases. Remaining clean (unpainted), they form the necessary pattern, ornament. Simple, interesting, inexpensive, and most importantly, open to creativity and original ideas the principle of reserving fabric bases - batik - became an incredibly popular type of needlework already in those days.
Patterned fabric
 It is believed that this technology is only compatible with fabrics made from natural silk:
The process of drawing a pattern on a silk base
- Modern technology is based on the use of a reserve solution consisting of glue (rubber is considered the most suitable), paraffin and solvent (you can use available gasoline) as a solution that blocks the ingress of paint on silk or cotton fabric.
- The resulting solution is used to process the outline of the pattern on silk. Remember that the drawing must have a closed line. To do this, some craftsmen use drawing on the fabric through a stencil.
- carried out using special glass tubes.
- Places of the drawing that do not go beyond the processed contour are covered with paints.
- The colors for creating a picture can be of a wide variety of colors, tones and shades.
- If the algorithm for drawing the pattern was carried out sequentially, then on silk or cotton you can see a multi-colored pattern with a white outline.


- If pigments are added to the reserve solution, ornaments with a colored outline can be obtained.
- The applied pattern should dry.
- At the bottom of the container with water (there should be a little water), place a textile with a pattern, having previously wrapped it in paper and rolled into a ring.
- The drawing is boiled for a quarter of an hour.
- The paints are fixed to the textile fabric. They turn out to be rich.
- After this procedure, the painting is resistant to color loss and moisture.
- A silk fabric with a pattern is taken out of the pan and washed under running cold water until the dye disappears from the canvas.
- The product is dried and ironed (only while the fabric is wet)


Drawing with stamps
 The experience of Indonesian artisans quickly spread around the world. In India, painting masters have also discovered the colossal possibilities of the Kalamkari technology. This is how the Indian creators of painting on fabric called the previously known "batik".
Fabric derived from applications this method coloring, differs from others in its ability to "amaze" the human eye, "inspire" consciousness with the magnificence, richness and originality of the decor, the multicolor, saturation and brightness of colors.
Initially, artisans used to paint on fabric with special bamboo pens, which were pre-filled with organic dyes. With quick movements of his hand, the master created only the outlines of the future Indian pattern. For the outline, the classic black color was mainly used, but the pattern itself was decorated using traditional paint colors.
Kalamkari is an improved batik. A few years later, the process of decorating (dyeing) textile fabrics is carried out using special-purpose wooden stamps. The outline of the future pattern is born on the fabric, which was then painted by the master using a pen and the subtlety of application. The fineness of the drawing process depended on the quality of the wood used to produce the stamps. Thoroughbred cellulose was considered quite valuable.
The cost of "kalamkari" depends on many indicators: the size, the beauty of the pattern, the art of carving.
The modern sound of the technology based on hindered access of the dye to the fabric is very diverse. or the Indian "kalamkari" - different names for the same technique.
Production technology
- Drawing on a fabric in black colors. For this, stamps are manually applied to the textile fabric. The number of such attachments reaches dozens of times.
- After drying the black patterns on the fabric, it is "painted" with stamps. To make the ornament look whole and neat, the main lines of the pattern should be observed. For coloring, it is recommended to use classic tones and shades.
Textiles are the basis for the technique
Considering the fact that the technology is more than one century old, it can be assumed that natural fabrics were used to create textile masterpieces.
- cotton;
- linen.
The use of synthetic fabrics for dyeing is not prohibited, but it is recommended to carry out a test to check the compatibility of paints and fabrics.
Lacheria
India is the mother of art and the daughter of beauty. She gave humanity another, no less interesting technology - "lacheria", which to this day is a real work of art.
The essence of the method lies in simple actions:
- the fabric is twisted with a tourniquet, and then tightly fix (wrap) those places on the canvas where it is planned to create stripes;
- the resulting structure is dipped in paint;
- As a result of the technological process of "lacheria", unpainted areas of fabric remain in the places closed by twisting a cord, and the pattern turns out to be unusually beautiful.
The end result of the technology is a "ripple effect" that is periodically located on the canvas, like waves.
Mehendi - cultural heritage of India
 Painting the body with patterns of their henna is called the mehendi technique. But very often this technique is used for dyeing fabrics. The only limitation is that dyed textiles should not have contact with moisture, since henna is an unstable plant pigment.
Therefore, this technology great for creating Indian panels, home decorations, elements of celebrations and ceremonies.
Historically, the mehendi technique can be performed in four styles:
- Arabic (there is no clear application scheme, predominantly floral ornaments prevail);
- African (using ethno-patterns. The most popular elements of Afro-patterns are geometric shapes;
- Indian style is one of the most difficult. It always occupies a large territory and involves a complex drawing, which is often based on an elephant or Indian symbols of fertility;
- European. Innovative approaches to the formation of the pattern combine a variety of oriental elements into one whole.

The most popular is the floral print (it has no restrictions on application and specially designed patterns). It can be an element of oriental painting or a pattern that resembles Arabic embroidery.
Secrets of the mehendi technique:
- successful painting "mehendi" directly depends on a properly prepared mixture for drawing;
- the main component of the coloring solution is henna (an affordable tool). Basma or iodine solution can be an alternative to henna.
In most cases, "mehendi" is used as a means of decorating the body, but there is no limit to perfection when natural fabrics take on the elements of patterns from technology.
«]
| The everyday life of a modern person is firmly connected with the diverse and colorful world of fabrics. We select clothes, interior items and upholstered furniture to our taste, their design and color scheme are like an external continuation of our "I". Fashionable, stylish clothes or interior decoration of an apartment is not only a way of a person's self-expression, a comfortable living environment, but also a kind of "message" about his personality to other people. Not always our tastes can be satisfied finished products from the store. In this case, special paints for fabrics come to the aid of a person. Modern coloring products allow you to realize your wildest fantasies. |
Hand-made drawing on fabric has long ceased to be exotic. Often, for dyeing fabrics, aqueous solutions of dyes are used with the use of a variety of chemicals, heat treatment, etc. However, at home, this is not always convenient. We believe that the most optimal solution for doing fabric dyeing at home, especially for beginners, but who want to try their hand at this type of creativity, is the use of indelible acrylic-based dyes that have ease of use, bright, rich colors and excellent resistance to fading. Combining fabric dyes such as spray acrylic paint, water-based spray paint, contour liners, fabric pastels, coloring, can help create a truly interesting, fashionable design for your clothes, home furnishings or upholstered furniture... A creative approach will help you to make a real masterpiece of creativity from a faded T-shirt or a ottoman that has lost its original appearance.
How to draw a drawing on a T-shirt?
In the first part of our article, we will tell you how, using the simplest tools and fabric dyes, and even without special skills, you can fantastically change your clothes, giving them a unique, individual style!
|
Let's consider the process of applying a pattern to fabric with aerosol dyes using the example of a regular T-shirt of a uniform color. We will tell you how to give an interesting texture to the fabric of a T-shirt using the so-called "knot technique", and how to apply an original pattern to it using a stencil. Note that these two ways of working with fabric can be used both separately and perfectly combined with each other. |
 |
What do you need to dye a T-shirt at home?
Step_3 Lay the T-shirt horizontally on a flat surface. Carefully cover the area around the painting with old newspapers or a special covering film, fix the covering material with masking tape.

Step_4 Carefully attach the stencil to the T-shirt using double-sided tape or spray glue for temporary fixing. Try to ensure that the stencil adheres to the fabric as closely as possible. Note that it is the aerosol adhesive that provides the maximum adhesion.
Step_5 Before starting work, shake the paint thoroughly in an aerosol can; shake it for at least 30 seconds. Apply spray paint in a smooth, circular motion. For better coloring of the material, it is advisable to apply paint at least 2 times, letting the previous layer dry for 10 minutes.
Step_7 As well as in the "nodular technique", on a drawing created using a stencil, you can apply patterns, ornaments or inscriptions in the form of clear, dense lines using colored liners containing a water-based textile paint.
Now that you've learned the basics of working with fabric dyes at home with a simple T-shirt, you can start experimenting with your clothes to give them an unusual, festive look. We are sure that your imagination, multiplied by the almost limitless possibilities of a multicolor palette of fabrics, will surely create interesting examples of creative thought.
If this article was helpful to you, please rate it (at the top of the page). Thank you!
Visitors to this page most often choose from the online store:
 What you need to open a hookah lounge, and how to do it correctly
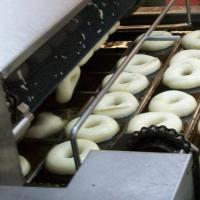 How to start a business and choose donut equipment
 Opening a company in Montenegro Open a company in Montenegro
 The carpentry shop as a business
 How to choose a business direction?
 Sample business plan of a dental office
 Five best business ideas that brought millions What business to open so as not to go bankrupt