Interesting work in mix media. Such a different mix media! Types of "mixed media" in scrapbooking. What we need for work
Nowadays, you will not surprise anyone with the style of "mix-media" in scrapbooking. Not everyone loves him and knows how to work with him, but at least everyone has an idea of what it is. But "mix media" continues to amaze us! In this article, you can learn about different types this style in scrapbooking. But first, a link to an online store where everything for scrapbooking is cheap.
Album in the style of "mix media"
Vika has laid out on the shelves all the nuances and difficulties of working with sprays, alcohol ink, paste, primer and stencils. After her MK, the style of mix media ceased to be frightening and incomprehensible to me.
Album made on MK at Vicki
Mix media style with acrylic paints
The acrylic technique for creating pages and covers is as hard as it is easy!
At first glance, working in this technique seems incredibly difficult. But if you take the time to figure it out, then you understand that "all ingenious is simple"! The technique is simple but time consuming.
For me, the teacher of the style of "mix-media" with acrylic paints has become. I don't know any other master who would so magically create page backgrounds and covers with acrylic paints, like Vika! When I watched not her work, I was tormented by only one question: "HOW?"
Thanks to the Wiki lesson on the ScrapPortal (Scrapbooking School. Stage 3. Album "Book of Life" from Victoria Sokolovskaya) and the joint venture in her blog, you can find out the whole sequence of creating mix-media works using acrylic paints, primer, paste and stencils.
Which type of mix media is best? Nobody will answer this question to you, except yourself. Experimenting with different colors will help you decide which technique you like.
The main difference between all types of mix-media style is that it allows you to create not just a scrap-work, but an art-object! Each page created with paints is a mini-picture made by your own hands. There are no rules and restrictions, only the master's fantasy, expressed with the help of paints!
To fall in love with the mix media style, you just have to try all the different kinds.
Mixed media master class
Mixed media is a mixed technique, which means that when creating the work, we used not one, but several materials, overlay methods. And it should be "full" or "equitable" use, not just for show. For some reason, it is believed that mixed media starts from the moment when 3 techniques are mixed. Now I will try to tell you how I made a bottle in the style of mix media. It is not difficult, interesting, and the result is pleasing and surprising.
What we need for work:
- A bottle of wine
- Masking tape
- PVA glue
- Various buttons, beads, jewelry leftovers, gears
- Adhesive Moment Installation
- Black, red-brown, gold acrylic paints
- Wooden plaque
- Twine
Getting started:
We clean the bottle from the label, it is possible not very carefully, since all of this will still be covered with a large layer of different materials, but it is better to remove the paper layer. It is not necessary to degrease the bottle, but if you are a pedantic person who is used to following the rules, then degrease it with alcohol. This will not affect the quality of work. But on the state of health - for sure.
We take masking tape and wrap the bottle, you don't have to worry about creases and wrinkles:

Here we have wrapped the bottle completely, without going over the label covering the neck:

We go through the bottle with our palms, tightly pressing and gluing what has not yet been pressed, not glued.
We take out beads and buttons from the bins and estimate. what can be useful to us: 
Let's admire the riches a little (how can we go without it). solving along the way. what will be useful to us in this work.
I decided to decorate my bottle with a lace ribbon along the bottom edge, as lace creates a nice embossed surface:

We glue the tape with PVA glue:

We are waiting for it to dry up.
Now is the time for the glue. Moment:
We string beads on a string, glue an impromptu necklace on the neck of the bottle, then buttons and pebbles.

I also had a cameo, we also attach it with glue for a moment.

Now we need a putty for wood, I have this one:

We need putty for that. to create an embossed surface on the bottle. In order to achieve this effect, we will put putty on those places of the bottle where there are no decorative elements yet. We apply the putty unevenly, creating a relief and at the same time we will press additional decor into the still damp putty, I have chip boards in the form of gears, metal keys, screws

We cover the whole bottle in this way, let it dry. Then we cover everything with black acrylic paint.

Dry again. We get a very embossed surface of black color, on which it is completely impossible to see what exactly creates this relief. At this point, you can coat the bottle with acrylic varnish. any. Acrylic - as it dries quickly. and we always want to quickly see the result of our work. So choose acrylic. and it doesn't smell.
Now we need to select the volumetric elements, for this we will go over with a sponge, first with brown paint, then with gold. we do not cover everything tightly. but we touch here and there. wherever you like. Now it will be useful to us that we covered the bottle with varnish before, since now we have the opportunity to erase the brown and gold paint from those places where we thought it was inappropriate to use them.
Not all at once I can predict exactly where to apply color spots, personally, I definitely can't do it. It is better to apply the paints one at a time. first brown, let dry. Then gold. Here is the result of the selection of the relief:


We get approximately the same bottle.
I also decided to decorate the bottle with a scroll on which it will be written what kind of wine it is.
To do this, print the text on office paper, we burn the edges:

Then we tint a little, for this we brew instant coffee, and dipping a cotton swab into it, we moisten our scroll, you can also sprinkle it with dry coffee in some places, to enhance the effect:

Dry, twist into a tube.
And in order to fix it on the bottle, we glue the handle for the box on the bottle:

We glue the handle with glue for a moment. Then we pass the scroll through the pen:

To denote that the bottle is not just an artifact from the bottom of the sea. but still a bottle of wine, we will make a wooden plate, glue a label printed from the Internet on it and attach the plate with twine. this way we will kill two birds with one stone, attach the label and mask the transition from the bottle to its neck:

Basically, if you don't want to make a sign, you can just wrap the neck with twine. will do well too.


In my opinion, it turned out to be a good souvenir! And we didn't spend a lot of time and money on it. Sometimes it matters!
I wish you inspiration! And so that there are many reasons for that. to use this inspiration is not in vain!
Author card
Natalia Petrakova

Founder of the Umbrella Mary Poppins project. I am fond of needlework and yoga.
Greetings, our dear readers! :)
Yes, yes, today we are starting another joint project of "Skrapovedenie"
During the course, you will receive a sea of inspiration, a charge of vivacity and good mood, and in addition to this, learn how to handle paints, pastes and primers!
To begin with, a few important organizational points.
We will make postcards in different styles, but using the Mixed media technique.
1. There are 5 stages in total, each lasting 8 days.
You can do the work on the 1st stage inclusively until June 17.
2. At each stage there will be mandatory conditions so please pay special attention to them.
3. Add postcards to links, and in your post place a project banner and an active link to the current post.
4. Don't forget to become our regular reader. And call your friends - it's more fun together!
5. And now about the most pleasant), according to the results of each stage, we will determine the TOP, FAVs and a prize from Memoiris!
Mixed Media - STAGE # 1
"We get acquainted with acrylic primer and stop being afraid of paints"
10.06 - 17.06
The first stage I want to devote to opportunities acrylic primer, with its help they create all kinds of textured surfaces. The primer can be used both for the base of the background, and create a "light spray" (using a dry brush or sponge). Drying, the primer acquires a slight glossy shine, its surface becomes smooth, somewhat reminiscent of leather or rubber. The dried surface of acrylic primer is water repellent. When interacting with ink, watercolors and sprays, the primer gives different effects. We will consider each separately in the subsequent stages.
Today we will try the most common use of soil - creating a background.
I'll show you a postcard, for which I made the background using soil, watercolors and a couple of splashes. Remember I promised to teach you not to be afraid of colors?! It's time for us to overcome our fears :). In my opinion: the most ordinary, accidentally spilled puddle of paint with our help can turn into something unusual and unique))) Girls, do not be afraid to experiment! Don't be afraid to screw something up or "make a mistake" - just because ... it's impossible! :) Let working with paints bring pleasure, not stress! Express yourself in color and emotions in splashes!
If it's difficult to decide on a color in the process, I want to recommend you an inspiring site with beautiful palettes.
Before the beginning practical work, I have selected the material that I am going to use to create a postcard. The set includes: a sheet of scrap paper 7 DOTS STUDIO, beige cardstock, white acrylic primer, sprays, glimmer glaze (purple), chipboard, flowers, microbeads, metal. decorations, acrylic drops, sequins, background stamps, a chip, an acrylic butterfly and watercolors (added in the process).
I roughly sketched the decor.
I took a sheet of scrap paper, I have it 7 DOTS STUDIO, cut a piece of the required size. Palette knife (can be replaced by plastic card) we begin to apply the primer. It is advisable to do this in one direction, thus creating only vertical or only horizontal strokes. We do this to make the result look more accurate.
Do not prime the whole sheet, leave unpainted areas, let the drawing be slightly visible - this is more interesting and mysterious :). Without waiting for the soil to dry, I apply the substrates under the decoration
so that the edges are not glued, the small decor with which I will decorate the postcard will look good under them).


I wait and admire) how they beautifully blur in the water. I add a brighter and more contrasting shade. Great! Drying with a hairdryer at low speed.
It seemed to me - not enough blots, I added more!
The background is ready, I send it under the press for the night. The next day, the sheet straightened more or less. I add stamps.
I'm starting to tinker with the decor ... Another small piece of leaf will not hurt)), again water, spray, drip ... Done!
I apply a rose, see what and how) I decided to powder the flowers with soil with a dry brush, and I dropped a blue and purple spray on the rose.
And I also covered the chipboard with soil. Attached ... Good!
Added flowers. Liked it, I leave it like that! I glue it on. I add transparent microbeads in places, glue it on the glossy accent under the substrates (if there is no glossy, you can take acrylic varnish), near the curls, you can on the petals. The effect should be created as if it was accidentally scattered and did not have time to collect yet))
I add an acrylic butterfly, after sprinkling it with alcohol ink (they fit well on a smooth surface and do not wash off).
Girls, alcoholics are difficult to replace with anything. There is an option - in Marabu Art Glass paint (gglossy, transparent paint based on organic solvent Marabu -GlasArt, 15 ml), sold in art stores. I have not tried it myself, but I read a lot about them, the effect is similar.
But nevertheless, I advise you to get exactly alcoholic ink - they have a rich palette, they are convenient to use, always the expected result! :)
Added a Scrapvell feature, blue and mint sequins.
It seemed to me that there was not enough lightness ... so I add sisal to the composition.

And she sprinkled the glimmer with glaze (it can be easily replaced with a regular spray). Glimmer glaze is like a liquid varnish in structure and can be applied to any surface: metal, paper, wood, plastic, fabric. Depending on the method of application, it can change its properties. If applied in a thin layer, we get a matte effect, with a thick one, we get a glossy one.
Next, I cut out the base for the postcard from beige cardstock, glued my blank to it.
Girls, do not forget about reverse side, after all, with her, the card looks complete.
Demonstration postcard photo session or a portion of inspiration from me:
The result pleases me, despite the bright spots, the card turned out to be delicate. The work achieved the effect of watercolors, the small decor blended well. And it was interesting to work with paints!
Now, the promised surprise!
Today we have our guest designer - wonderful Lena LoveCreativ!
Her works surprise, inspire, and sometimes even amaze with their extraordinary approach.
Natasha, thank you very much for the invitation!
My name is Lena, I'm 36, I live in Krasnodar with my family: husband, five-year-old son and five-month-old daughter. By education - a philologist, by occupation - an editor in a glossy magazine. I have been fond of scrapbooking since 2010. I love experimenting with colors and coming up with new techniques.
I will be glad to have guests on my blog.
I decided to create a monochrome work with a bright accent.

5. Video MK for creating pages
Below I offer you a video MK for creating mixed media pages that use various materials and techniques typical for Mixed media.

Mixed-media is a very wide range of amazing techniques that can be used to solve a wide variety of creative challenges. These techniques are quite versatile, I would not limit them to the scope of any style.
Plus, it's an ongoing experiment with discoveries at every turn, so it's a very exciting kind of creativity!
In mixed-media, you can combine, transform materials, mix, paint, create textures, and achieve interesting effects.
Manufacturers delight us with a huge selection of various pastes, mediums, pigments, etc., which are not so easy to understand even for an experienced scraper, not to mention beginners. Of course, all these materials are very interesting and convenient to use, but I would advise those who have just started to master mixed-media not to try to buy everything at once and not get upset if, for example, you have few sprays - a lot of materials can be done with something to replace. You can even make a texture paste yourself, and with different effects, and sprays can be mixed from watercolors, especially interesting overflows are obtained from watercolors with mother-of-pearl, it is also good to use multi-colored artistic ink and even dilute food dyes (by the way, they are very bright, only here I can't say anything about their archival nature ...)
It seems to me that everyone should try themselves in mixed-media, because good emotions will not hurt anyone))
Several fabulous works by Nadia:


... they often ask me to tell you about what a media mix is for me, and at master classes I try to show it .... breathe into each one .... I'll try now to do it with words .... I hope I succeed and you will be able to feel what I feel:
... it all starts with a primer, then the choice of a stencil, a paste and then the most unusual things begin - paints, sprays, pigments, shimmers ... this is how magic is born.
What do I think about when I spray on paper, interfere with the colors? Everything is very simple and at the same time incredibly difficult - I don't think about anything ... I just free my head from all thoughts ... pure consciousness, you can call it whatever you like, but it is precisely this kind of creativity that brings me a thrill ... a charge of such power , which allows you to make a full-fledged album in a couple of hours ...
the more I study esotericism, Vedism, and so on, the more I understand that thoughts are often directed not at creation but at destruction ... we are constantly afraid of doing something wrong, choosing the wrong colors, making the wrong transitions, comparing ourselves with someone then, forgetting in this vanity that we are us, and we are unique ... there are no mistakes ... there is an experience and each experience, like a person, is unique.
For me, mix media is art therapy .... it can be compared to a visit to a psychoanalyst only much cheaper :) .... I feel good - my mix has warm and light tones, something worries me and the corresponding colors are visible in my work. .. there are a lot of works that I don’t show on my blog and that no one except my husband and daughter sees, and sometimes I don’t even show them ... not because the work didn’t work out, no ... they’re just too personal, too intimate ... so I get out of myself all my worries and fears and give them to paper with the help of paints and colors ... I relive these moments again ... sometimes moments of pain from the distant past, from childhood ... I pour it all out and forget ... I live this experience again and let it go so that it never comes back ... and it helps me, and I also like to work with mantras. They are relaxing.
If they ask me, what can I advise those who have decided to engage in and master the mix of media, I will only say one thing - do not pursue a vocation, it will come by itself when your works learn to speak, when they do not look like others, because will reflect you and carry your story ... beautiful works millions .... there are so many of them that sometimes you just get lost among them, but there are only a few LIVE works ... just remember this!
And some of Victoria's works that are stunning in depth of feelings:


Mixed-media is more than just a style, it is to some extent a state of mind.
These are interesting, exciting techniques and techniques. You almost never know what the end result will be.
When I asked the girls on MK what mixed-media was for them, everyone usually represents a lot of things and at the same time nothing in particular.
I like the fact that mixed-media can be different, multifaceted. It can be light, gentle, or impudent, playful, grunge. It all depends on you. It is important to let go of yourself and plunge headlong into creativity!) It often happens that you do something by accident - wow, nothing happened so cool, you will need to remember this technique! When painting, you want everything to dry faster, because the process is very exciting and you want it sooner and more, more. I have already written more than once, I am not a fan of the finished work, but of the process, materials! I really enjoy trying new materials and techniques, watching how they mix and how they behave.
I am often asked - What do you need, what materials do you need to try? I have defined the following minimal list for myself:
Soil and paste
Masks (not necessarily ready-made, you can make yourself or find an interesting pattern in the house)
Paints (even children's watercolors are suitable)
Palette knife and brushes
Watercolor paper
That's probably all, you can start experimenting) The main thing is not to be afraid of anything! Try and train!
Several soulful, history-breathing works from Elena:


Long time I had no idea that my works are mixed media. I just really like to experiment, try new things, mix paints, mess around in pastes, gels, etc., I like to watch the appearance of unusual effects, both expected and completely random. It turns out that mixed media is all I love! I love making hand-made mix-media textured backgrounds! But it is also colorful hands, and sometimes a face; multicolored jars in smudges all over the house. These are brushes that you forget to wash; this is patience, because you have to wait for the next layer to dry, but there is no strength to wait, and you have to keep yourself busy washing the same brushes, stencils and stamps. Mixed media is an amazing process! Mixed media is a delight for kinesthetics and visuals!
The main advice for those who are taking the first mix-media steps in working on a scrap page, remember that mix-media is not an end in itself, it is only a means to embody your IDEA. ALWAYS go from photography! Unfortunately, now there are many works where photography is in no way connected with the background, with the decor; where paints, pastes, just for the sake of using paints and pastes, and not in order to play along, emphasize the photo.
Think "WHY?" Why am I taking this stencil? Is it because it is new and fashionable and your favorite craftswoman uses it often, or because this texture will help you go beyond the boundaries of photography?
When buying materials, think about versatility: background, not subject stamps, stencils that can be used in different styles, inexpensive pastes and primers (Sonnet, Tair), watercolors (I really love mother-of-pearl). When you feel cramped in this, you yourself will understand)))!
Several inspiring, imbued with love for people, and such different works of Nina:


We are very grateful to the girls for taking the time to open a piece of their mixed-media world for us!
And now you, our dear participants, now, so puzzled, but at the same time inspired and elated, are ready to plunge into this wonderful world!
Stage task:
You need to do any object in stylemixed-media, required condition for this stage - use of masks / stencils.
Now let's see what our design team has created! Indeed, for some of them, this style was an experiment and a way out of the comfort zone! They will tell you about their emotions.
For me, Mixed-media is relaxation, I immerse myself in the world of colors, a way to express thoughts and feelings. Sometimes they are grungy and dark, and sometimes they are a riot of colors.


The style was not easy for me. I painted a lot, primed it, with the help of a chipboard, brickwork made an imitation of a brick. I used a lot of details from different materials - chipboards, charms, plaster jewelry, flowers, scrap paper, fabric, lace, semi-pearls, I even found the use of a "dog" from a lightning. The page is called "Enjoy the moments", the moments that pass so soon, because time flies irrevocably fast, and our little ones grow up by the clock.

In my work, I decided to combine the style of mix media with my infinitely beloved eco. And I have formed a divider in the book for storing the herbarium.
Well, let's start the magic?)))
Materials:
1. The base that we will decorate(it is not necessary to take the same notebook - it can be a cover, a box, a photo frame ... By the way, who is the first time, I strongly advise you to start with small forms, for example, with a tag, automatic telephone exchange or, say, a notebook A6 - here your imagination is not limited by anything, although if you feel the strength in yourself - of course, take what your heart is in!) But this is what I worked with:
2.Acrylic primer(I used different ones, but I didn't notice much difference, so take what we have!) Immediately prepare a spatula or palette knife (it can be replaced with an ordinary old plastic card), a brush and gauze / bandage, and an ordinary kitchen sponge.
3. Texture paste(There are also a great variety of them! Since all the paste will be "smeared" with paints, it makes no sense to take with any effect in this case. We will start from the simplest, basic level).
4. Stencils and / or masks(the difference between them is that with a stencil, the area of the drawing itself is painted over, and with a mask - the area around the drawing, i.e. its outline is created). I used 3 types.
5. Acrylic paints
... If anyone is just planning to buy paints, I can advise you to take small sets, where there are all the main colors, for example, Decola. Then, over time, when you yourself figure out your color tastes and preferences, you can buy separate jars with specific colors. They are enough for a much longer period, and the paint in them does not dry out due to the tight-fitting lid. For example, for this work, I originally prepared a set like this:
Little to do with the result, right?))) If you want to repeat a gothic palette, like mine, you only need two colors - black and white. And so, again, everything is to your taste!
6. Stamps, better background, of course, unobtrusive, and either with a very small or with a rather large pattern - we will stamp on a textured surface, so half of it simply will not be printed (therefore, we will leave beautiful curls and butterflies until better times!)
7. I have used more embossing, but this item is absolutely optional, so you can safely omit it.
8. Well, actually decor- here I am not your advisor, but only your inspiration and vision of what is happening!)
That's all. We'll discuss the rest along the way. Here we go?)
Step 1.
We prime the entire surface.
Decoupage women know that it must first be degreased, but I am not a decoupage woman, and therefore I skip this point with a clear conscience) I ground it with a palette knife, you can use a plastic card. In the photo, I showed the difference between applying primer with a brush (below) and a palette knife (above).
It is more convenient to use a brush to pass through folds and other hard-to-reach places.
* It is better to work on oilcloth (for me this function is performed by a postal plastic envelope), paper and newspaper can stick to the ground and the process of "tearing off" threatens to break the integrity of our coating *
Step 2.
Next, let the soil dry out a little. but not completely. Cut off a piece of gauze and mohrim the edges so that there are no lumps and nothing will fall off and stick together (as soon as you start to straighten the gauze, you will understand what I mean =) Simply otherwise, when we start to "glue" it, the edges will bulge and bulge ugly ...Then we apply gauze to our work wherever we please, and "primed" ... It is more convenient to do this with a brush. I usually go with broad strokes from above around the entire perimeter of the gauze, and then, when it is fixed in place, carefully ground the edges so that there is no noticeable transition of the gauze to the base.
Step 3.
Now that the gauze is well oiled, we send the work to dry. You can just wait until everything dries by itself, happy owners of a hair dryer for embossing can dry it with it, and I was so lazy to fiddle with a hair dryer that I found another solution - I put the cover in front of the fan heater)))Step 4.
The next step is working with texture paste . We take stencils or masks and randomly apply the drawing we like to various parts of the work - they do not have to be different, like mine, it is quite possible to do with one stencil.I'll make a reservation right away: if you have a large stencil, say, 30x30, you don't need to cover up all the work with just them! In the vast majority of cases, it does not look nice and cumbersome. It is much better if, even from the same stencil, in different places you apply small, sometimes even torn pieces of the drawing - so immediately the work will have some kind of charm, thoughtfulness and style. Try it!)
Press the stencil / mask tightly to work (self-adhesive stencils are very convenient in this regard!) And apply a thick layer of texture paste with a palette knife or a plastic card. It is advisable to do everything in one direction, removing the extra layer of paste and smoothing it over the surface (again, to understand what I mean, you just need to try!)
And one more such moment - where we have a gauze, we need to choose a larger stencil / mask pattern, otherwise it will partially "fall through" into the pores and it will simply be difficult to see.
Here's a background I got.
Always try to leave an "empty space", i.e. without texture paste (don't look at me - I'm not an important example)))) We will need it in the future!
Step 5.
Next, we take paints, a brush and a kitchen sponge. (we cut it into several convenient squares). In fact, the whole secret in a beautiful application of a layer of paint lies precisely in this sponge) Where we do not have gauze, you can immediately start painting over the background with a sponge - first with smearing movements, and already pressing / smacking on top) Where the gauze lies, first you need to carefully paint over the entire space with a slick, and then go through the second layer with a sponge. We do not regret the paint! =) If you need to apply another layer, wait until the previous one dries, otherwise everything will simply be smeared.Step 6.
So, we painted over all our work with the colors / color we wanted. . If you have chosen as your colors several colors, it is better if they are of a similar shade, so that you can make smooth transitions. To make such a transition is not at all difficult: first, with a sponge at the border of flowers, carefully climb one color onto another - like mine, for example, first "chpok" black on white, and then vice versa - white on black. By the way, I use a separate piece of sponge for each color, for convenience)
Step 7.
Now we are doing the work completely harmonious! To do this, apply a little white paint to the sponge and barely pressing it, carefully paint over the convex pattern from the texture paint on the black areas, it turns out very beautifully - as if we covered it with snow or frost) If you have other colors, then also choose the lightest of them and we go over everything else with a sponge, or if the color scheme allows, we take the same white acrylic and tint all the work with it.Be sure to tint the edges with paint - this gives some completeness and completeness appearance work.
Step 8.
The next step is stamping ... I chose only two types of stamps - rhombuses and background text. stamping with paint! Now it becomes clear why we had an "empty" place from the texture paste! Only then will all your stamps be fully printed. Wherever there is a texture paste and even more gauze - half of the picture will be "eaten". But in our case it is not scary, because in mixed media it is even welcomed =) We stamp randomly, dispensing with (!) an acrylic block (this way a much larger percentage of the picture will be printed). I stamped white on black and vice versa, black on white)
Step 9.
Further stage is optional - embossing) If you have a place free of gauze and textured paste, you can safely emboss on it some bright, contrasting pattern. If, like me, there is no such place, then you can use the embossing pad to walk over the convex pattern from the texture paste, cover it with powder and bake it with a hairdryer. I got a certain effect of "shining in the sun" frost, unfortunately, almost invisible in the photo = (
Step 10.
I always advise all decorations to either be sewn on a typewriter / by hand, or attached to brads. So our final touch and ... voila!)
I got a cover with contrasts. What will you get? I hope my MK will be useful for you to create your small (and maybe even big!) Masterpieces, give you self-confidence and give you a little inspiration!)
I am also looking forward to your participation in the ScrapMaster "Style Month: Mixed Madia" marathon! You can still have time to please us and yourself with your wonderful works in this style!

And also, among those who, participating in our marathon, will do their job on this mk (with a link to it), I will choose one that I like the most, and regardless of whether it got into our general TOP or not, I will nice little gift for your future mix-media achievements) I promise you will like it;)))
Thank you for attention!
 What you need to open a hookah lounge, and how to do it correctly
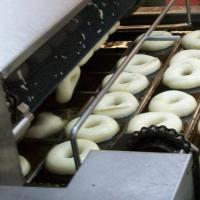 How to start a business and choose donut equipment
 Opening a company in Montenegro Open a company in Montenegro
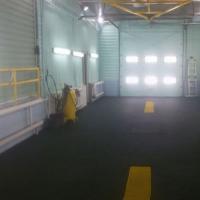 The carpentry shop as a business
 How to choose a business direction?
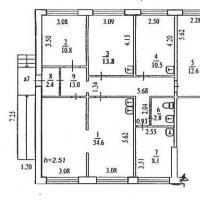 Sample business plan of a dental office
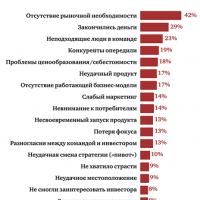 Five best business ideas that brought millions What business to open so as not to go bankrupt